Watch the video below OR scroll down to view the steps listed out instead.
TABLE OF CONTENTS
Video Tutorial:
Step By Step Guide:
Prior to any integration the QuantHub representative needs to capture the production and sandbox (if applicable) issuer URLs to whitelist in CloudFlare.
Brightspace Steps Part 1
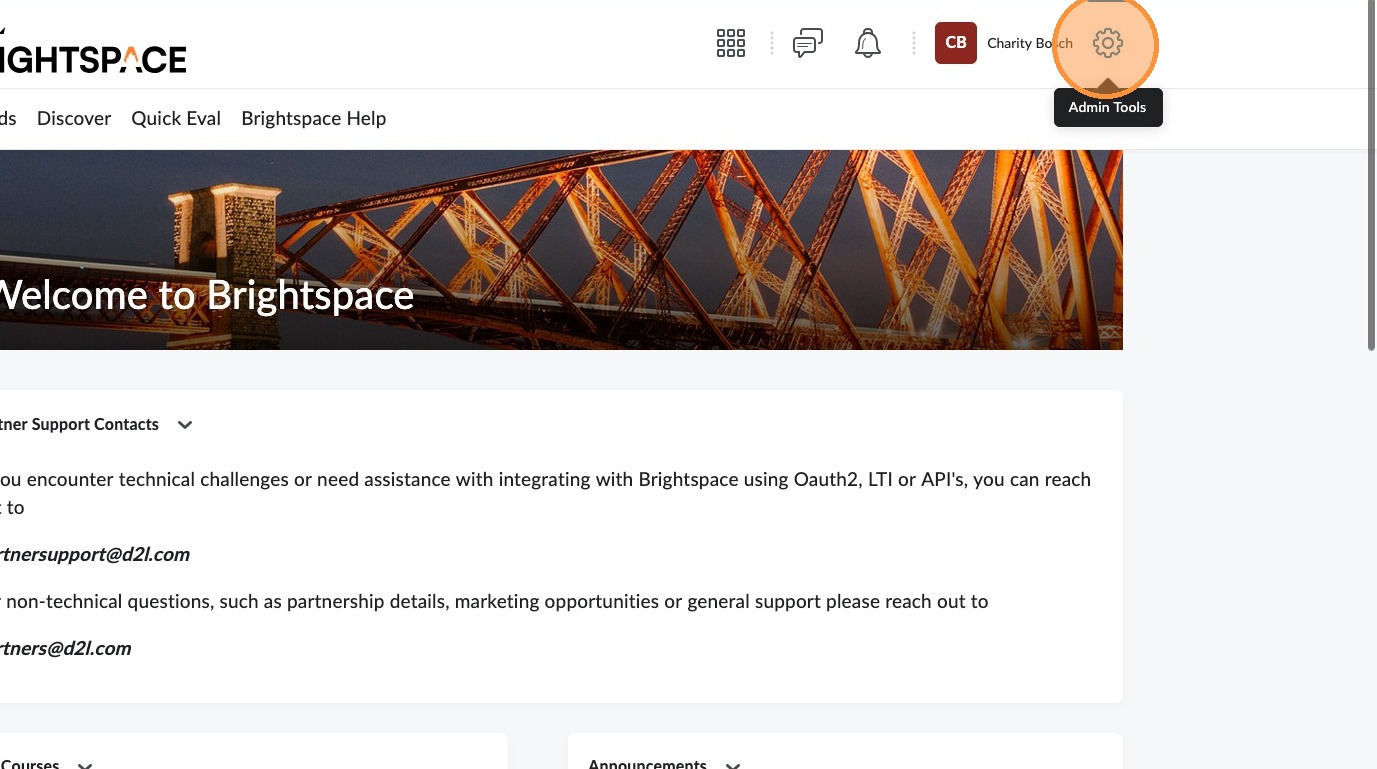
1. In an administrator account in Brightspace, select the Admin Tools (gear icon) in the upper-right corner.
2. If necessary, select "All".
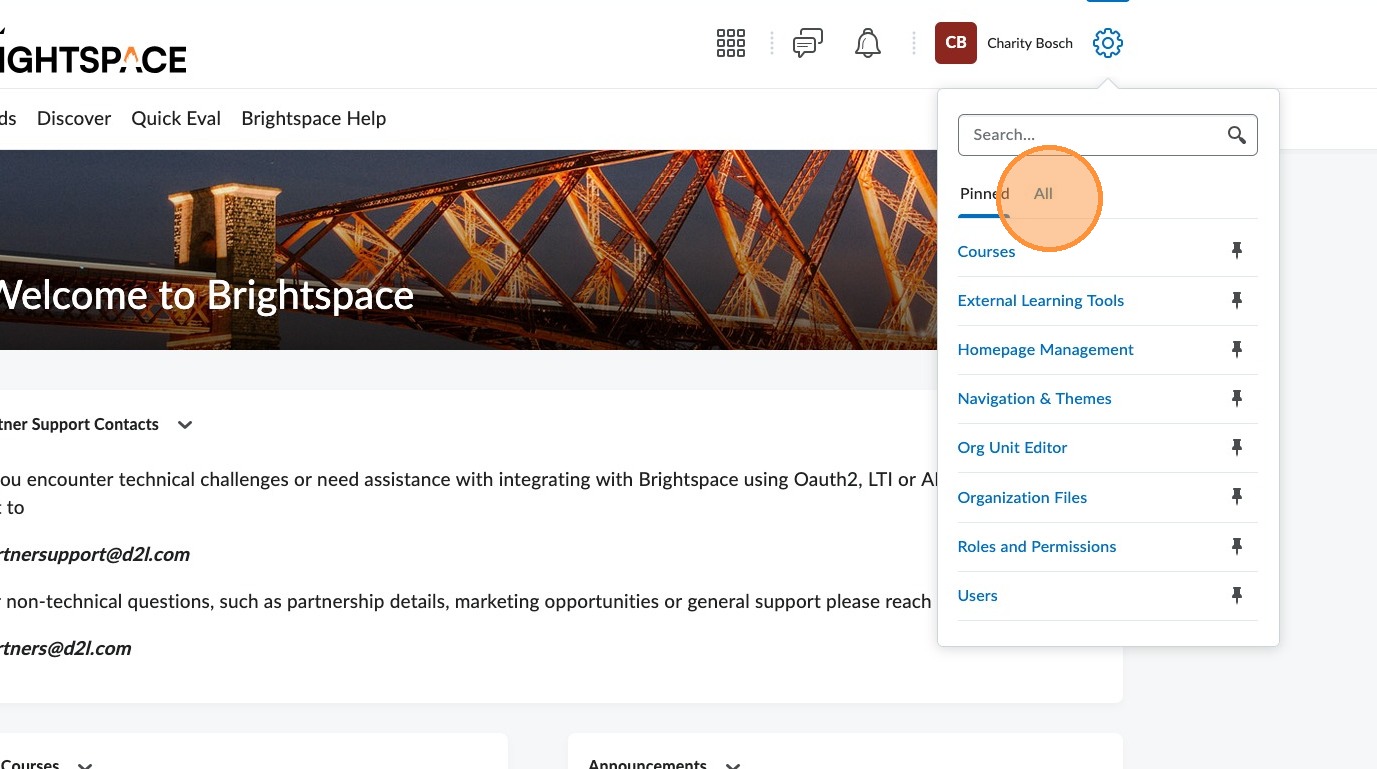
3. From the menu, select "Manage Extensibility".

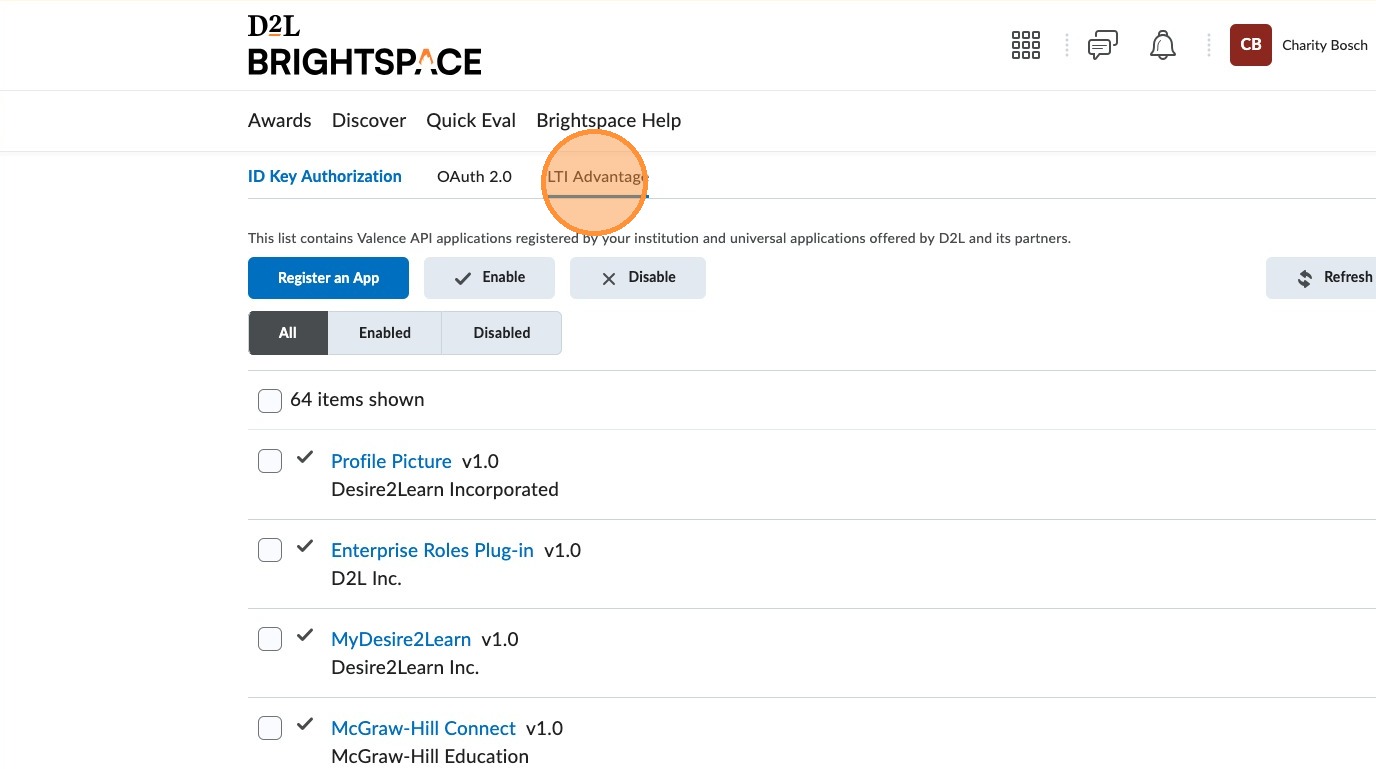
4. Select "LTI Advantage".
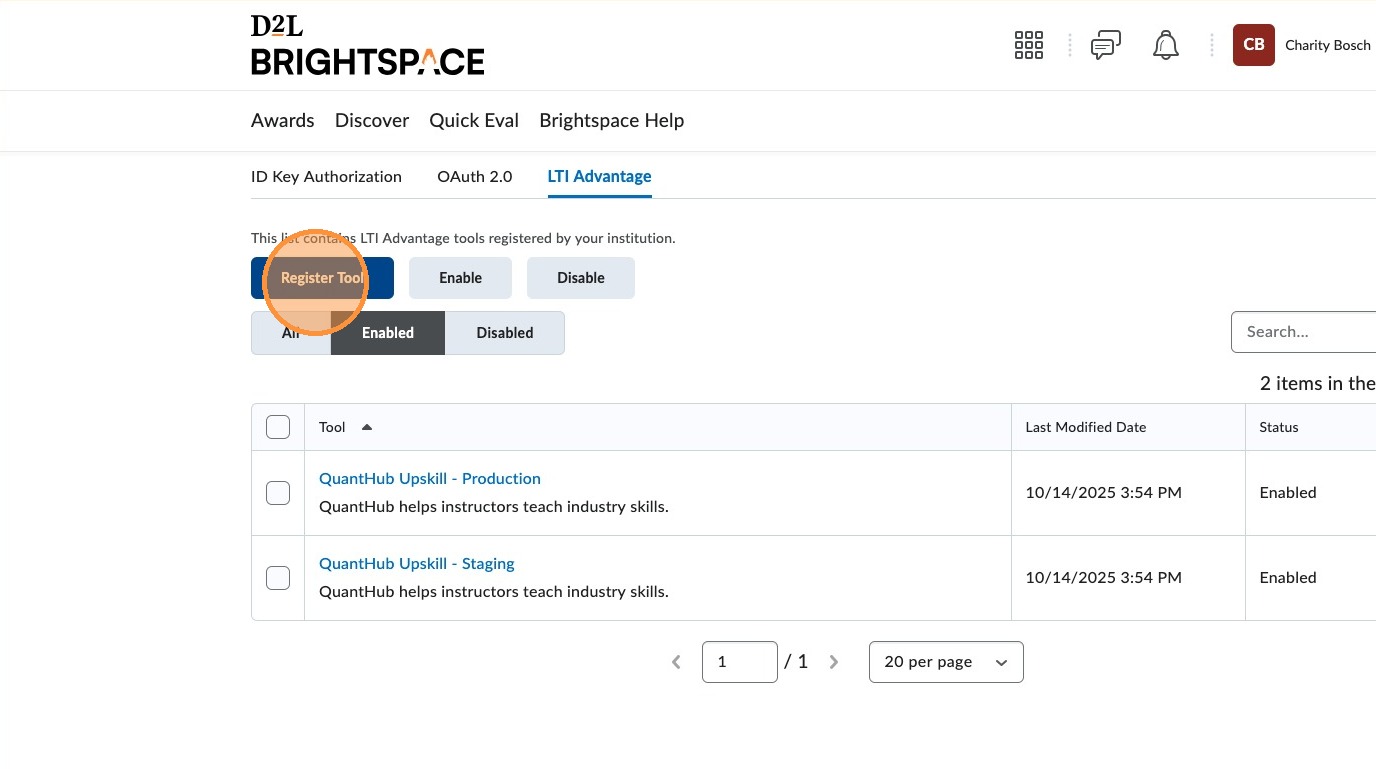
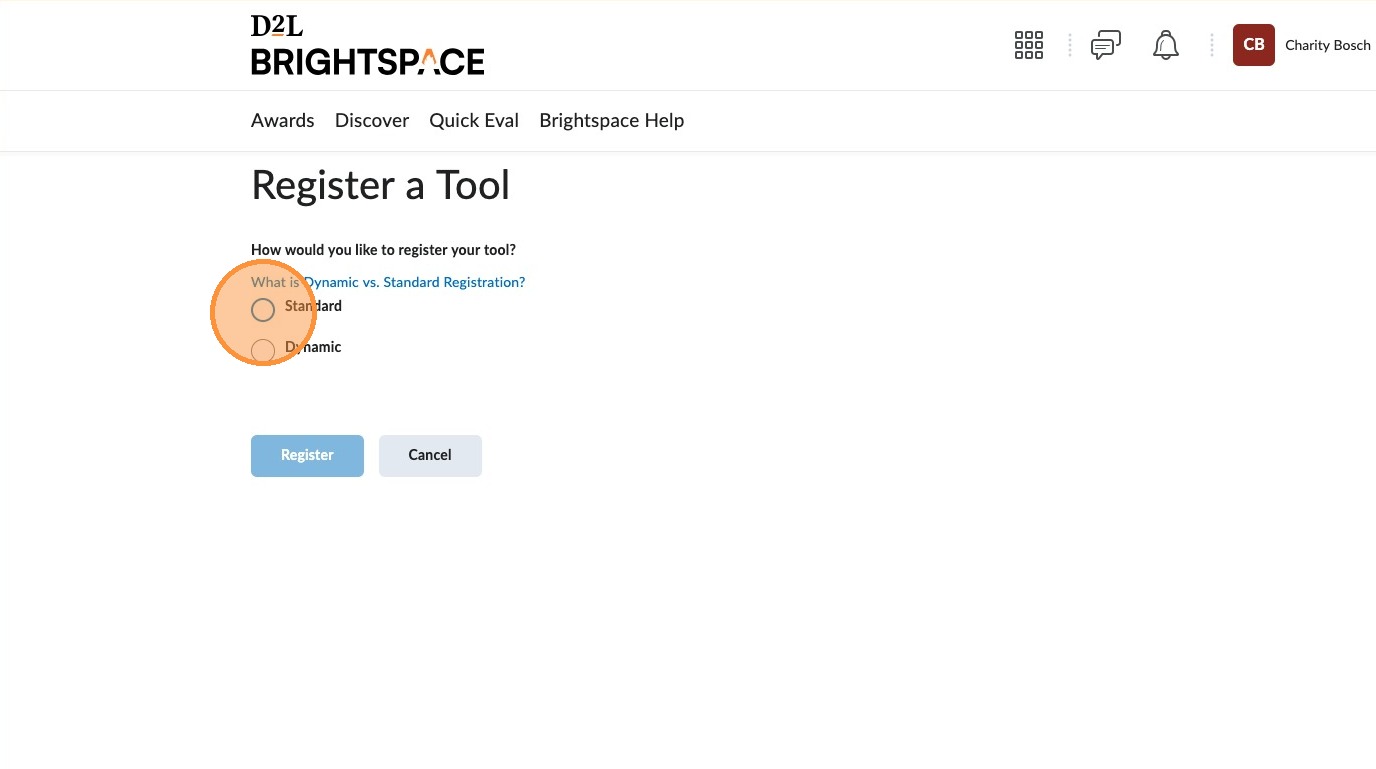
5. Select "Register Tool".
6. Select "Standard".
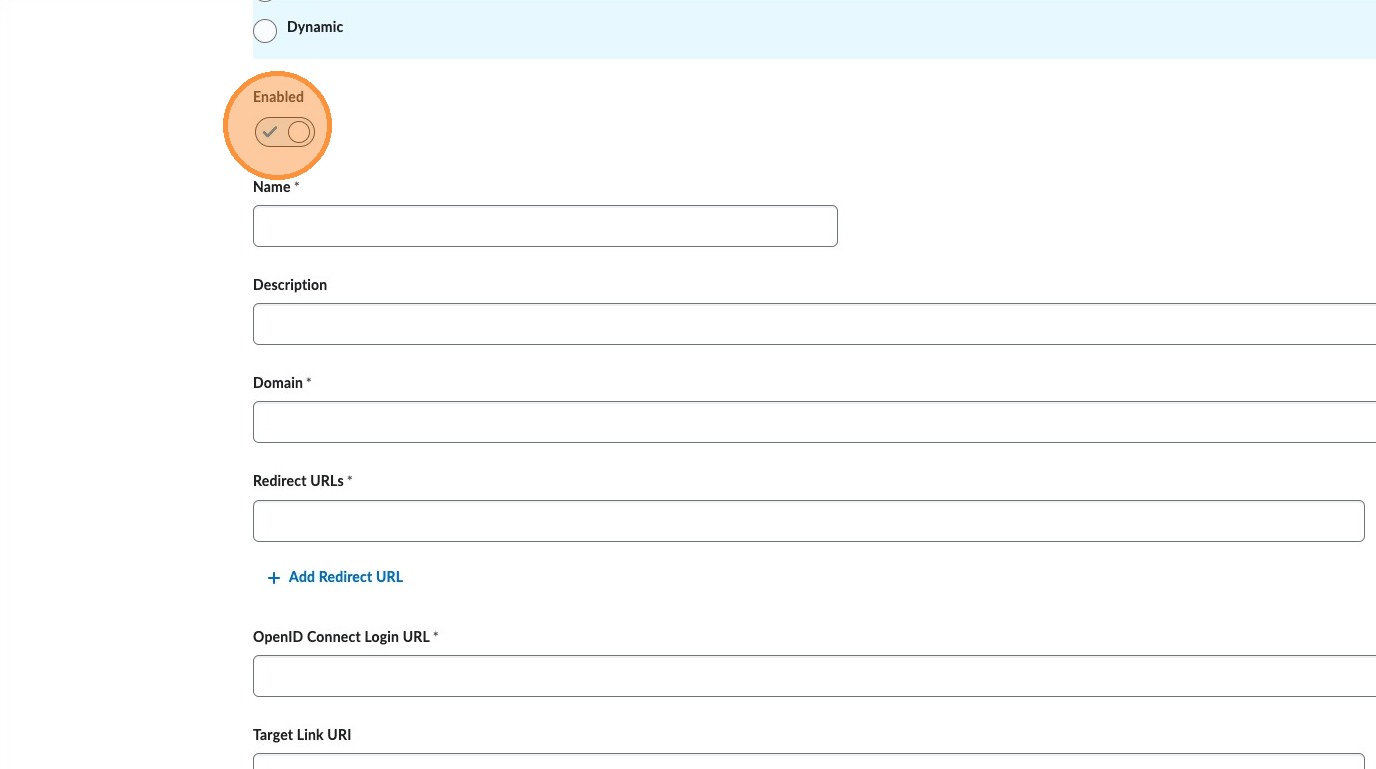
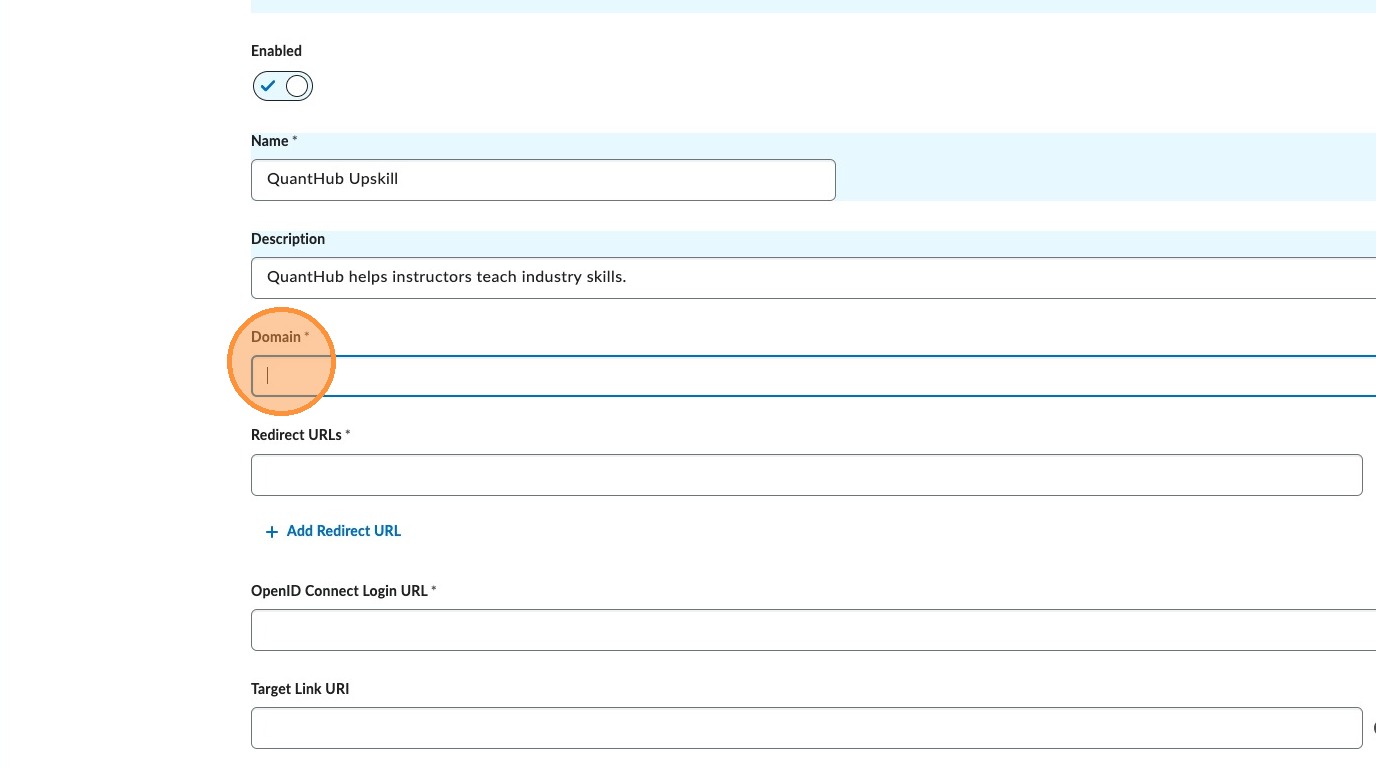
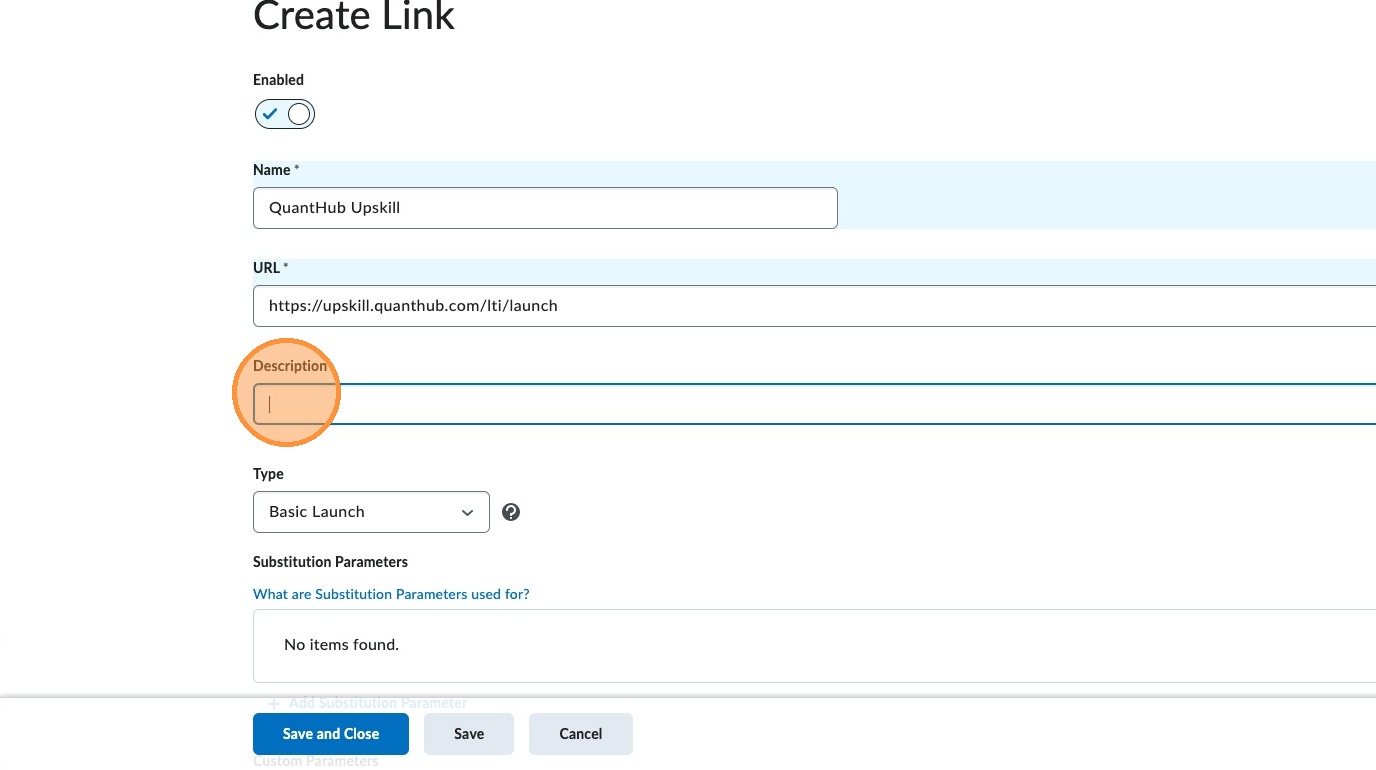
7. Ensure "Enabled" is on.
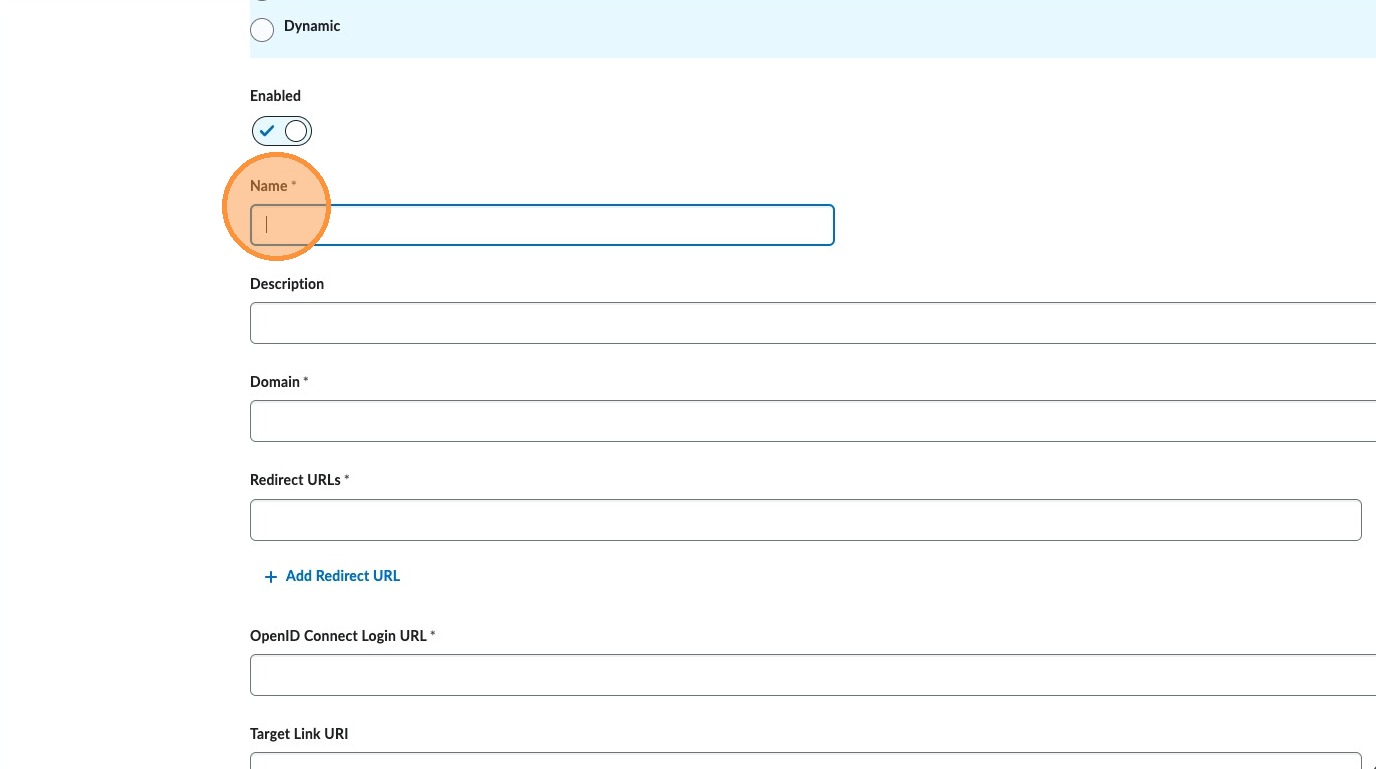
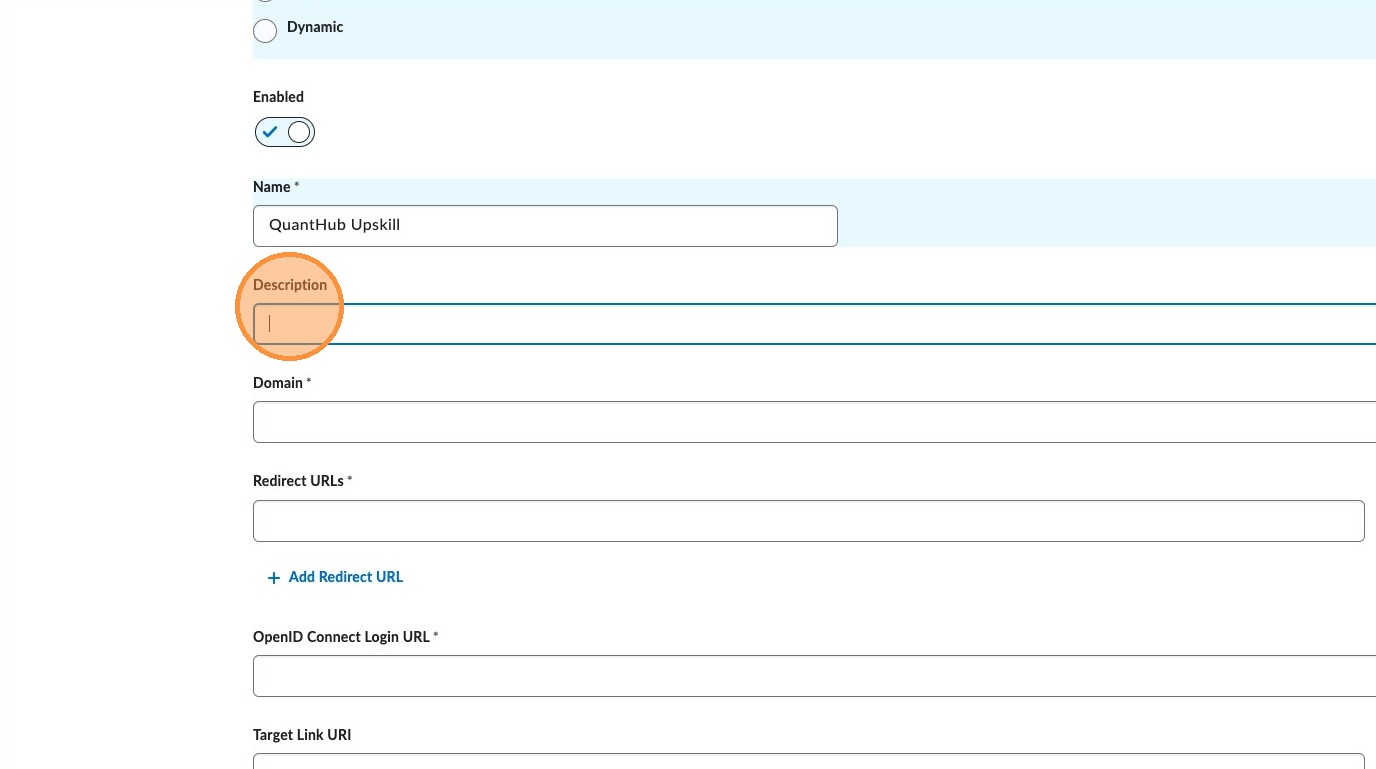
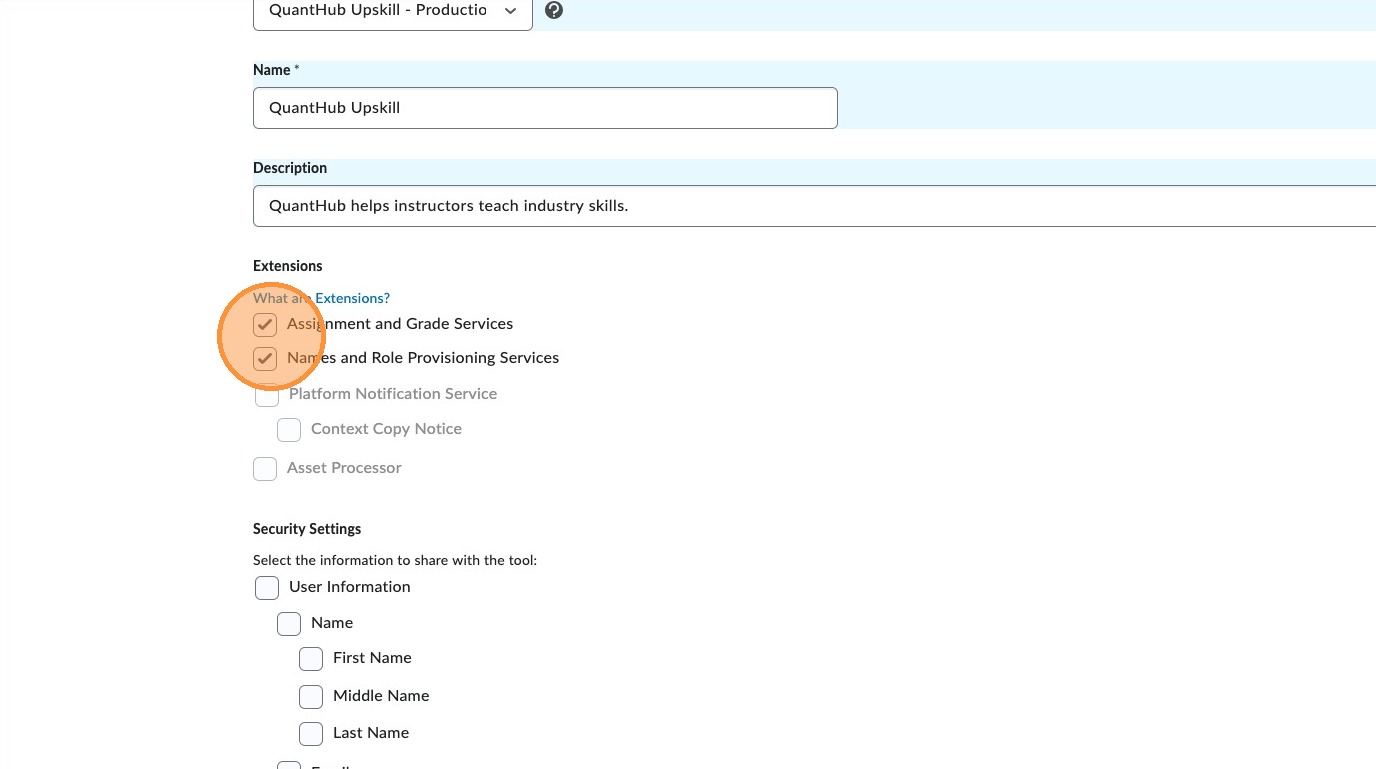
8. For name, enter: QuantHub Upskill.
9. For description, enter: QuantHub helps instructors teach industry skills.
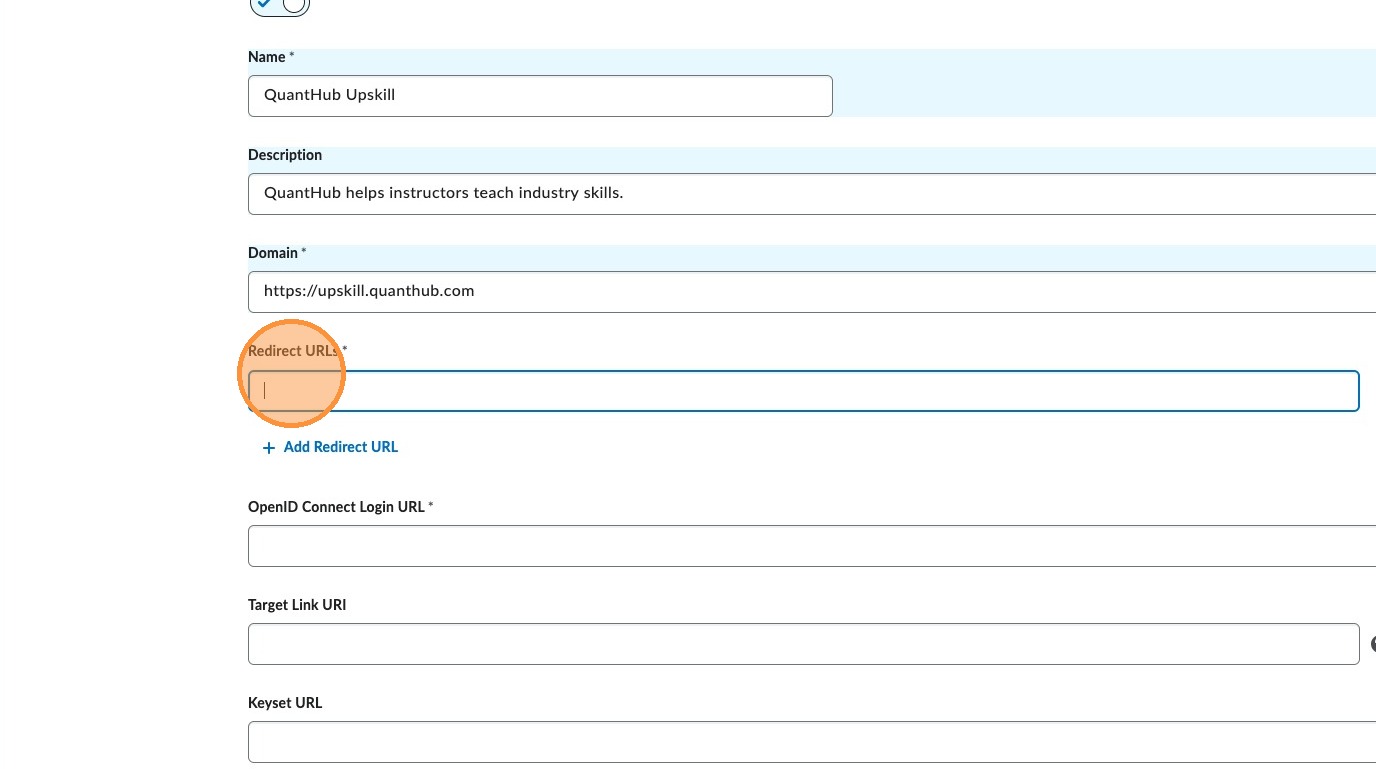
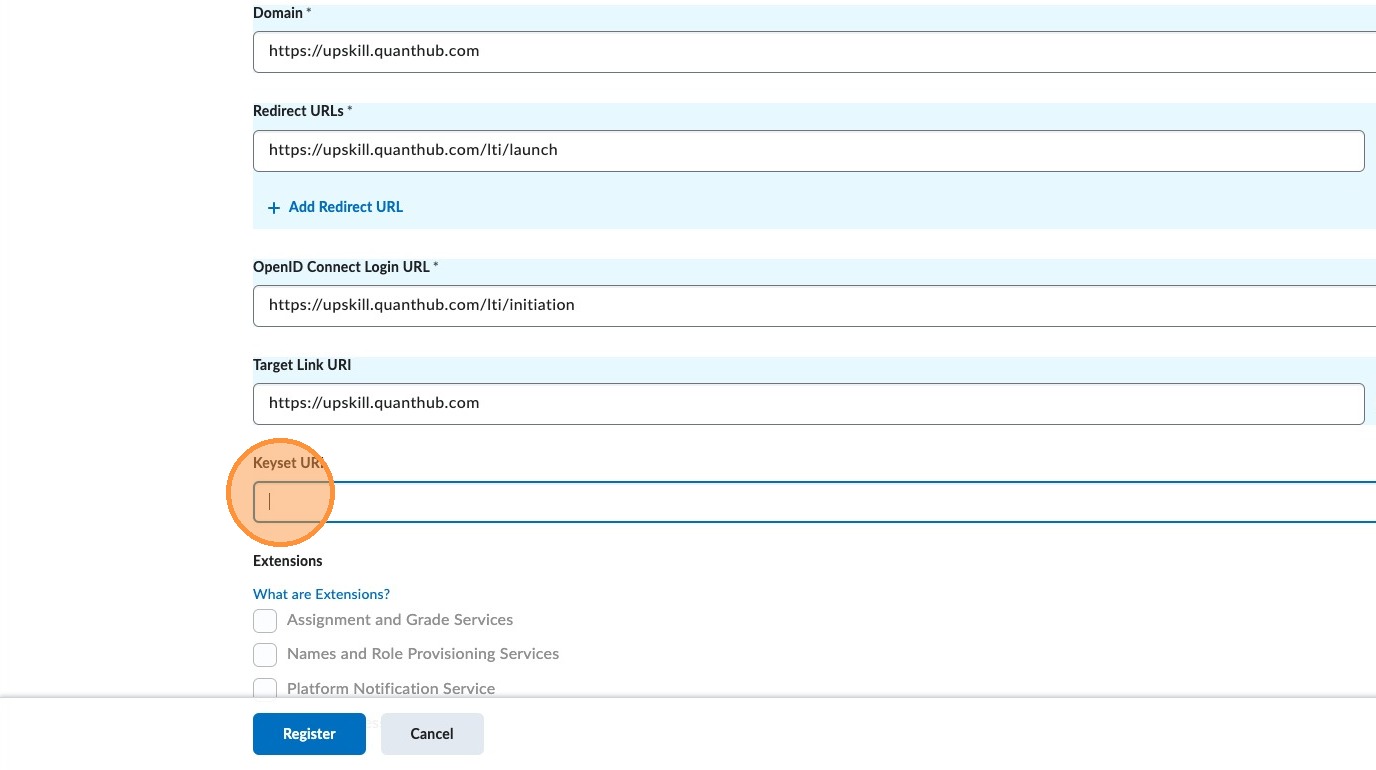
10. For domain, enter: https://upskill.quanthub.com.
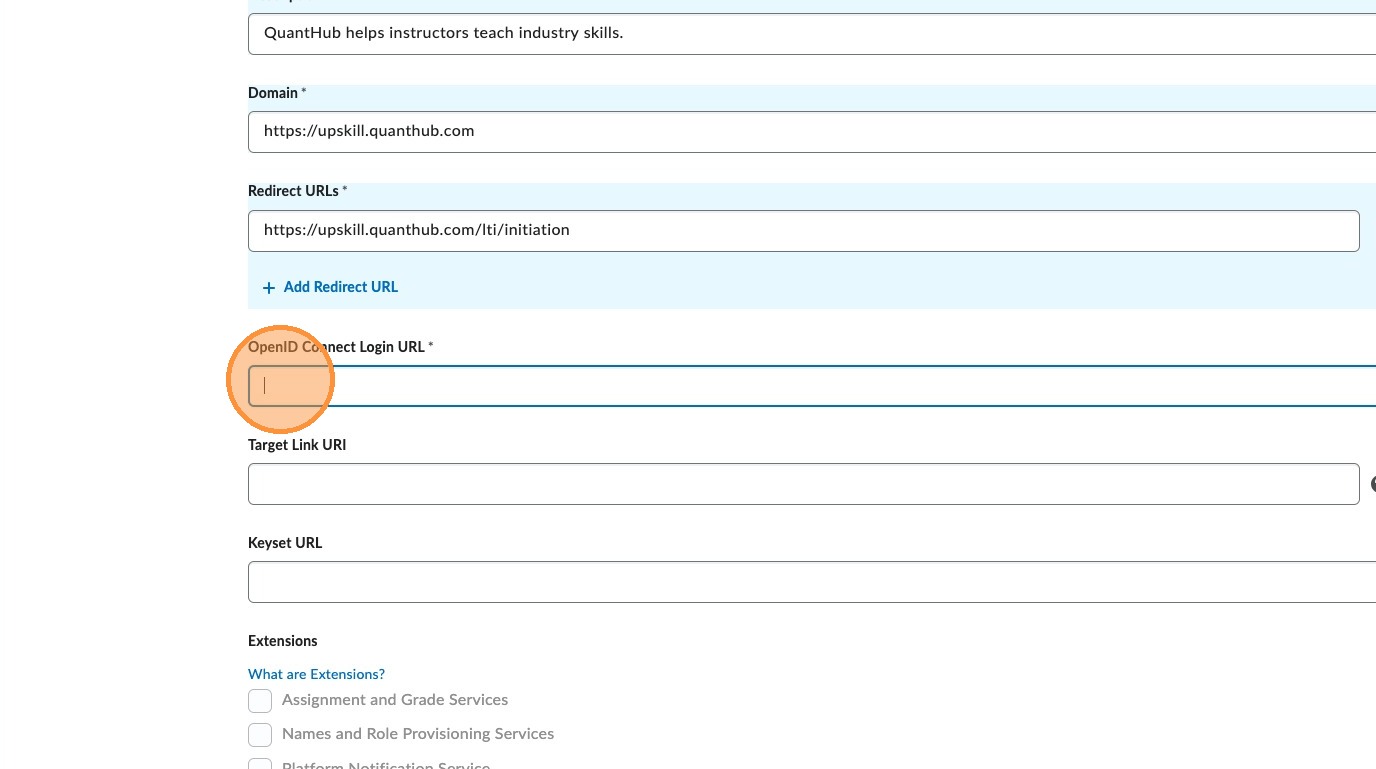
11. For redirect URLs, enter: https://upskill.quanthub.com/lti/launch.
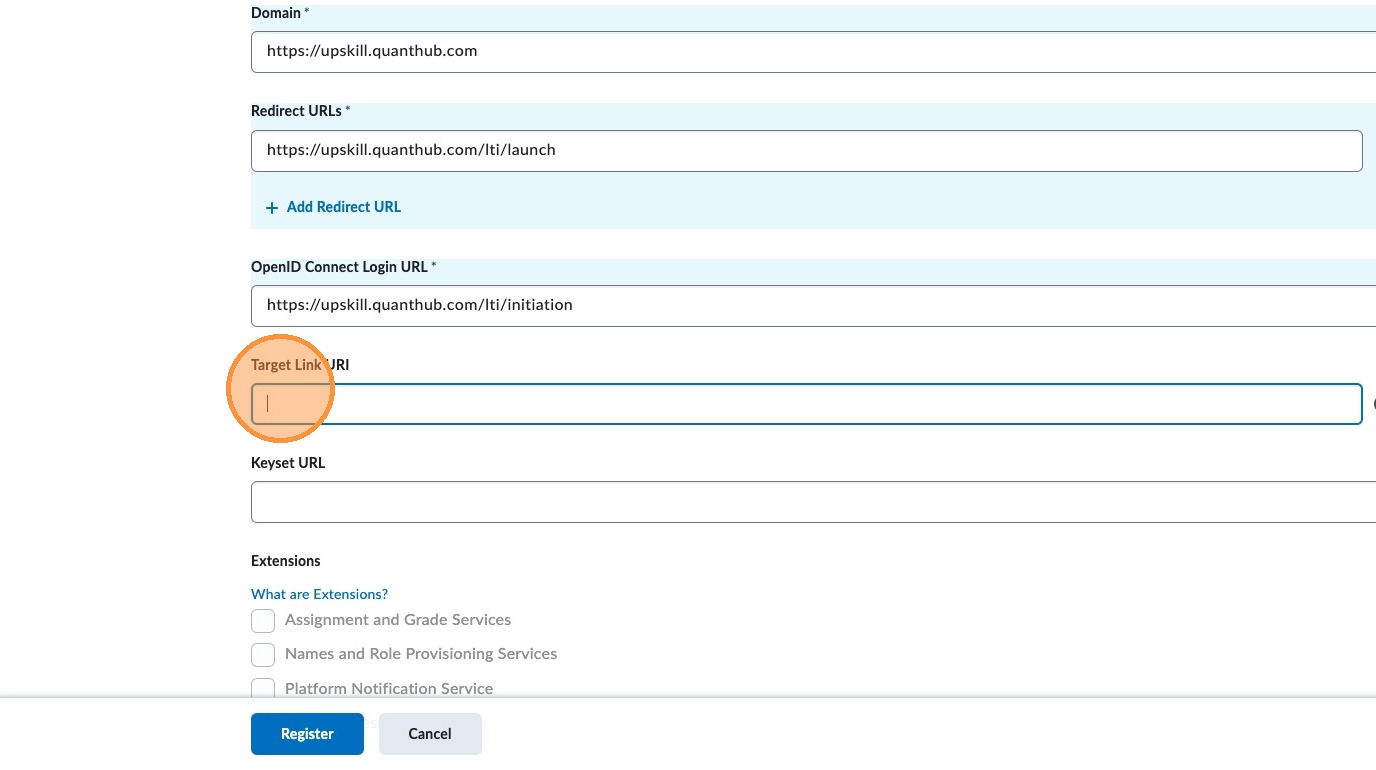
12. For OpenID Connect Login URL, enter: https://upskill.quanthub.com/lti/initiation.
13. For Target Link URI, enter: https://upskill.quanthub.com.
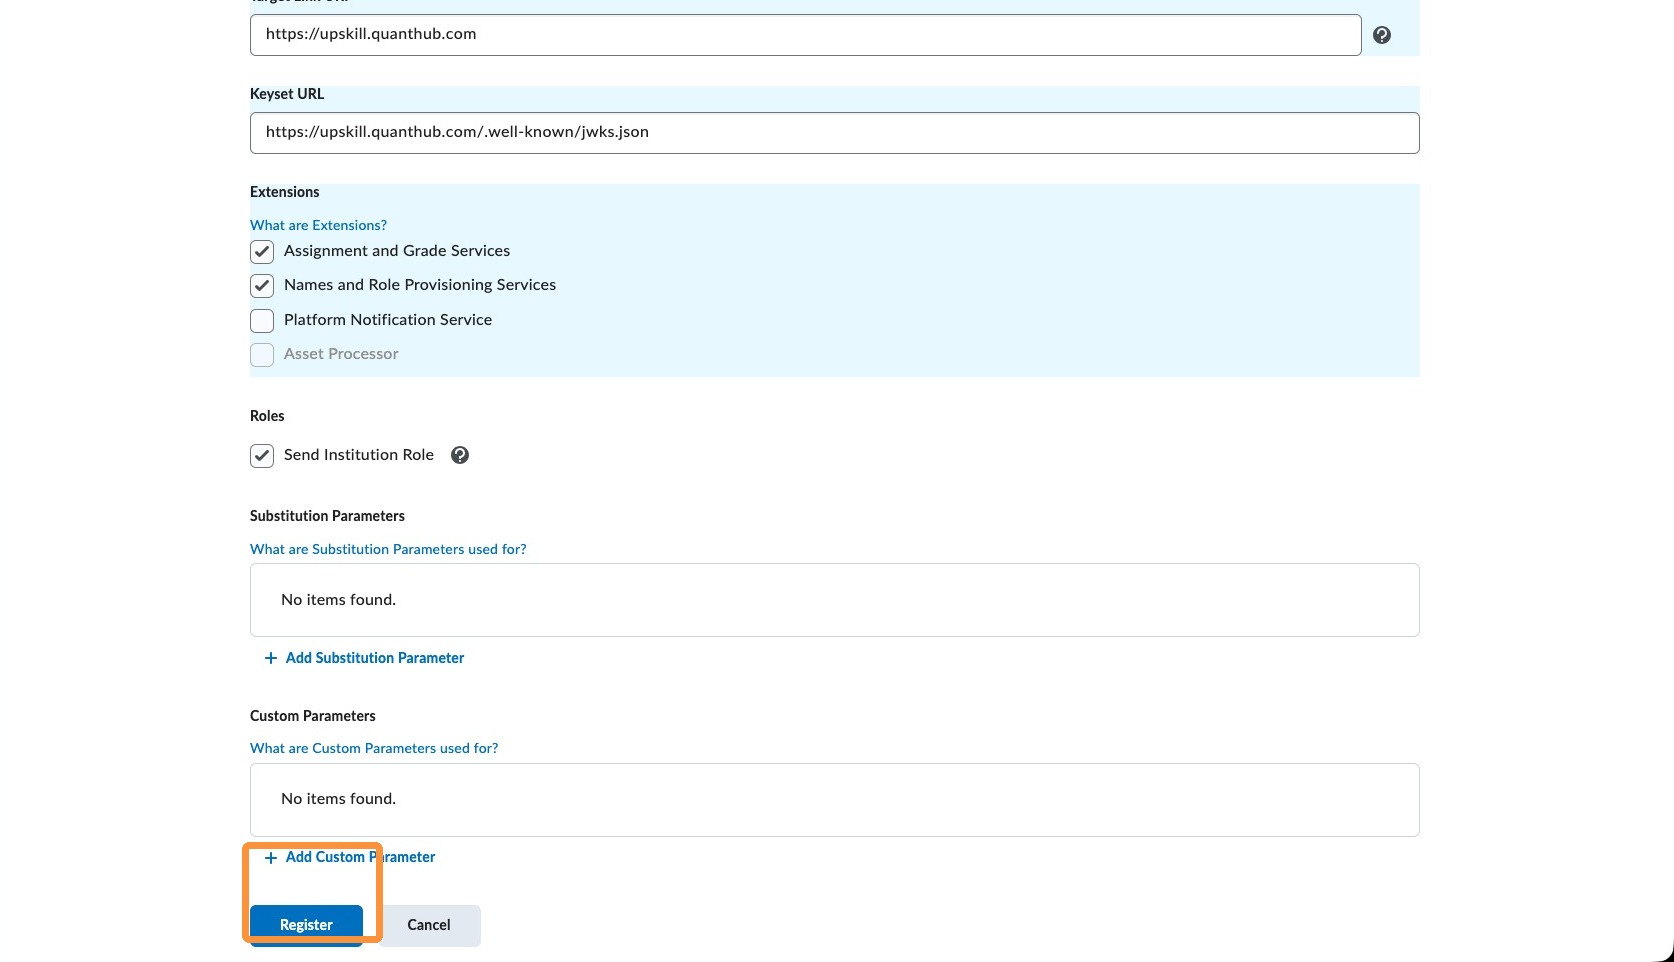
14. For Keyset URL, enter: https://upskill.quanthub.com/.well-known/jwks.json.
15. Under Extensions, select both "Assignment and Grade Services" and "Names and Role Provisioning Services".
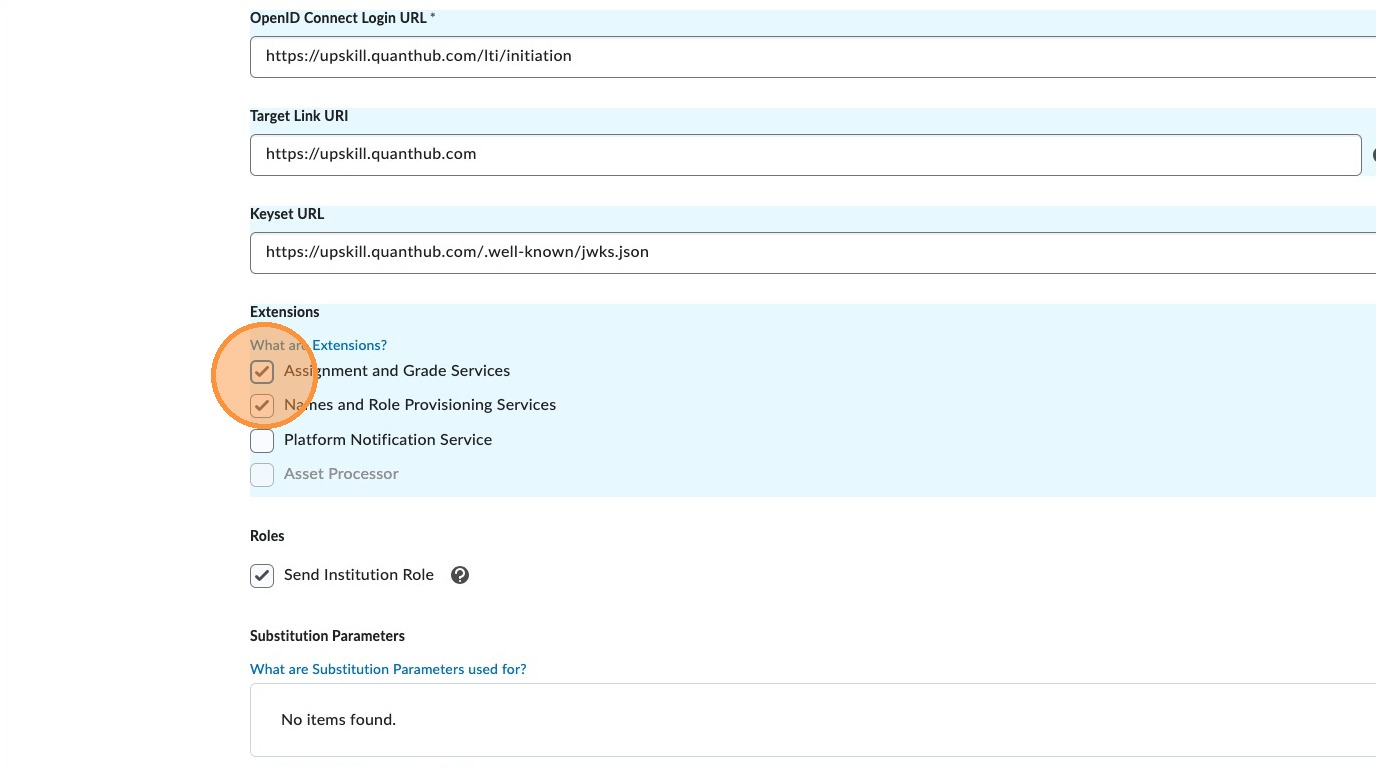
16. Under Roles, select "Send Institution Role".

17. Select "Register".
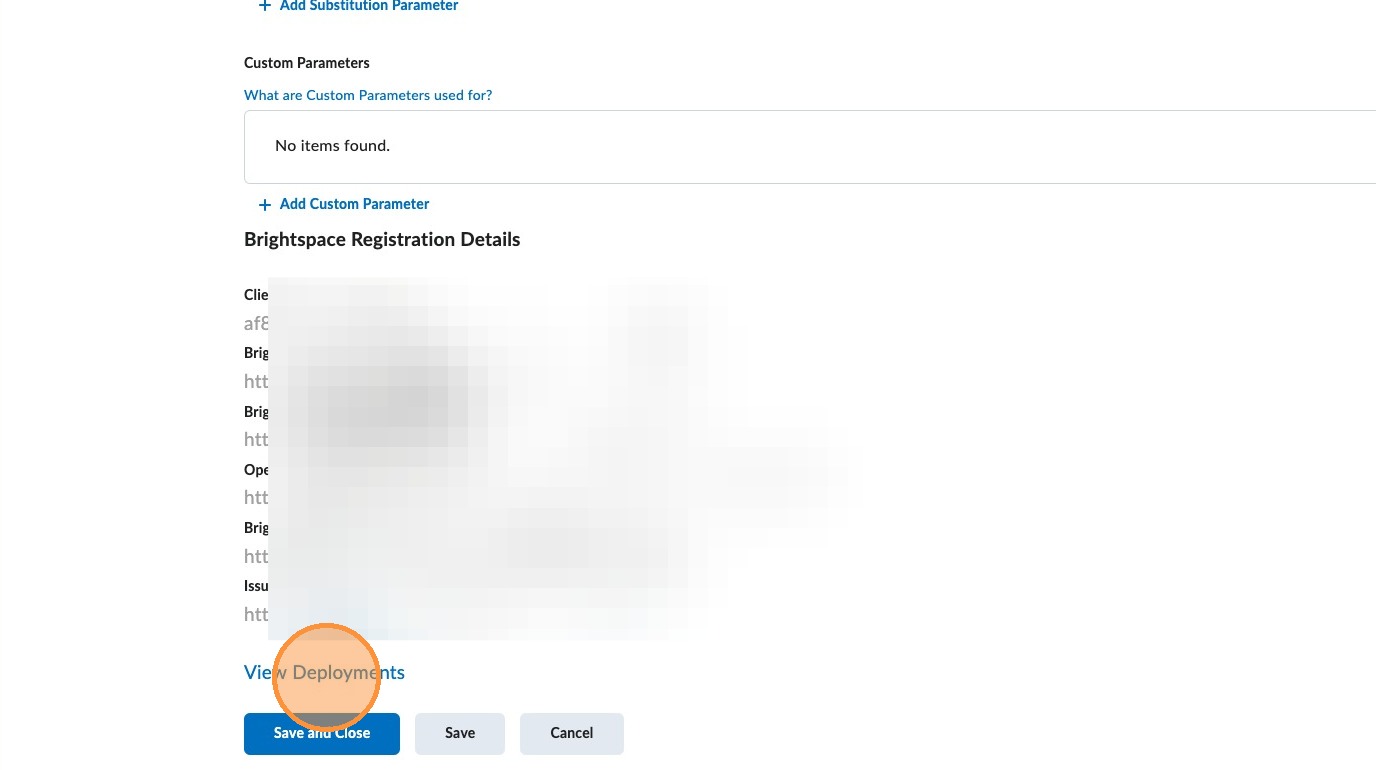
18. Once you complete the tool registration, Brightspace/D2L will provide registration details. Leave your instance open to this information.
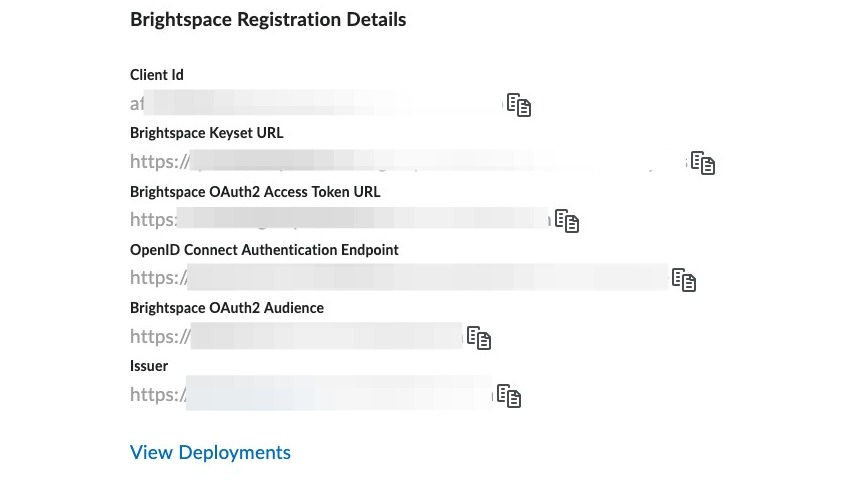
Note: Share this information with your implementation specialist or support@quanthub.com.
QuantHub Steps
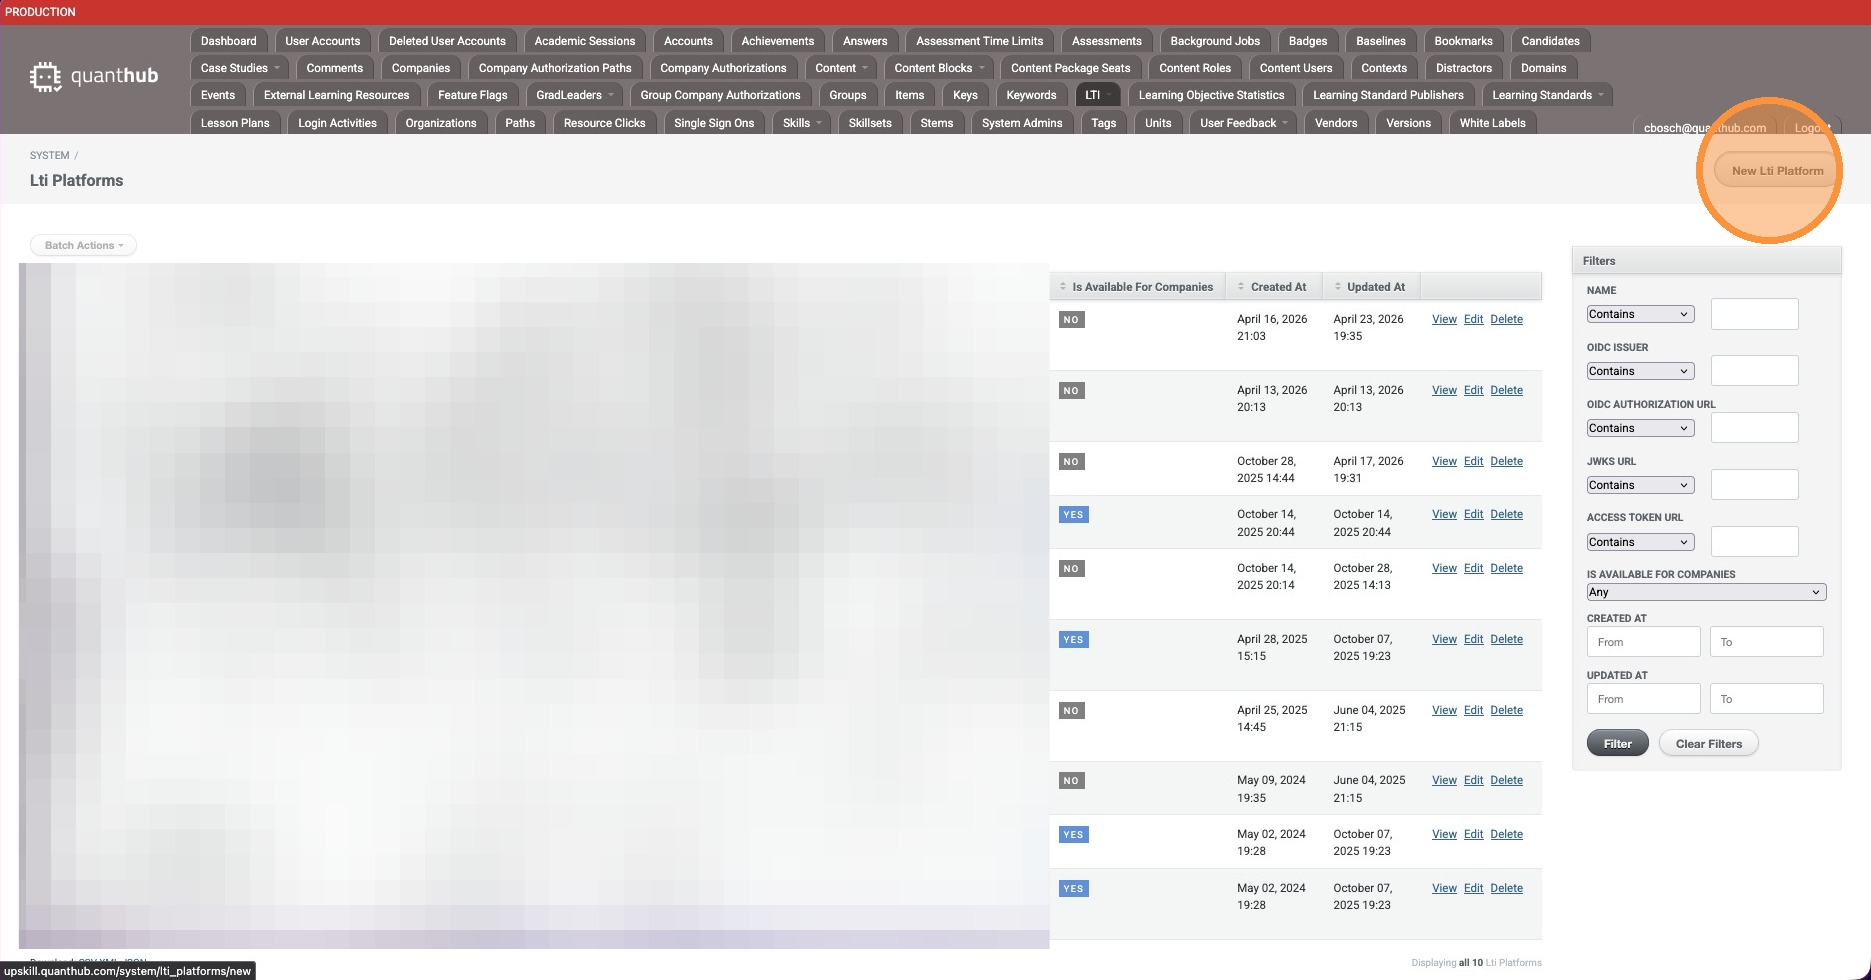
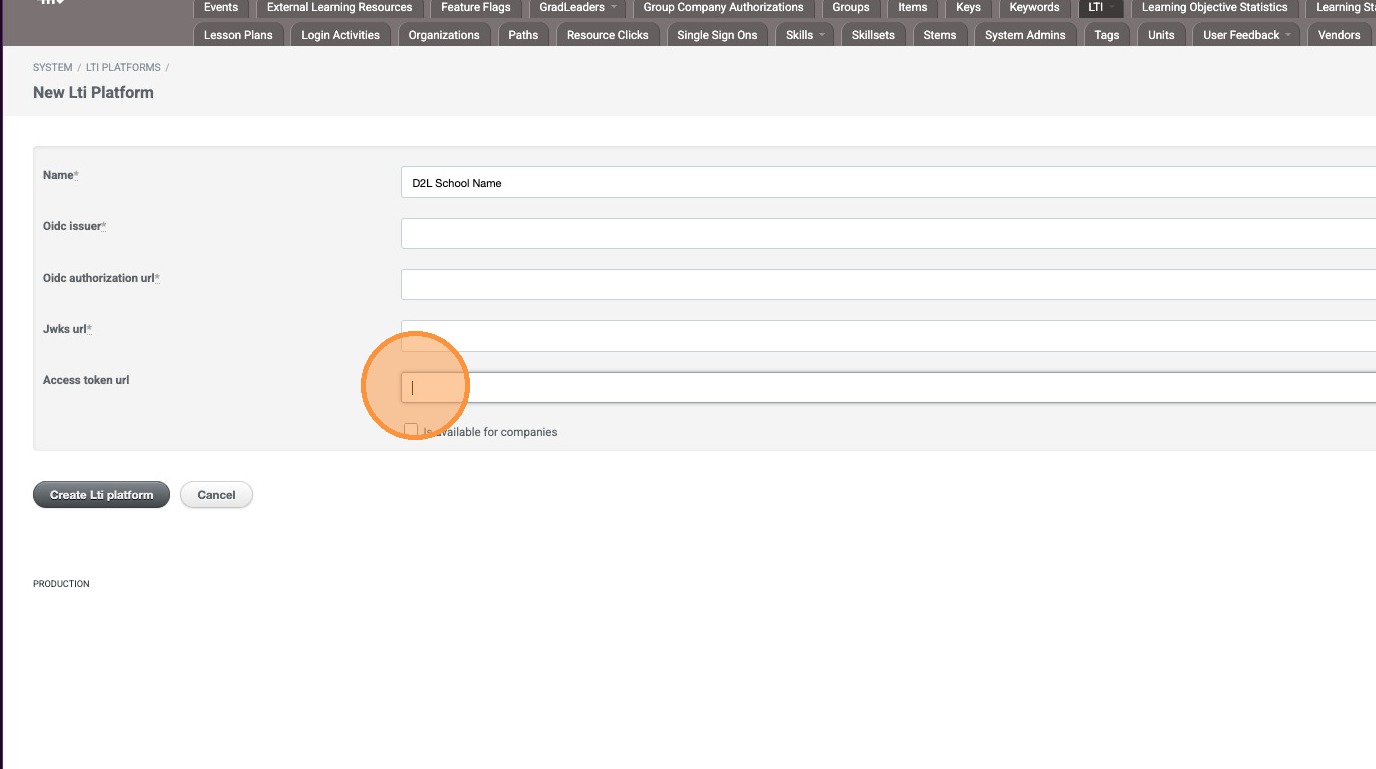
19. Navigate to the LTI menu in system admin and select LTI Platforms. (Steps 19–27 will be completed by the appropriate QuantHub personnel.)
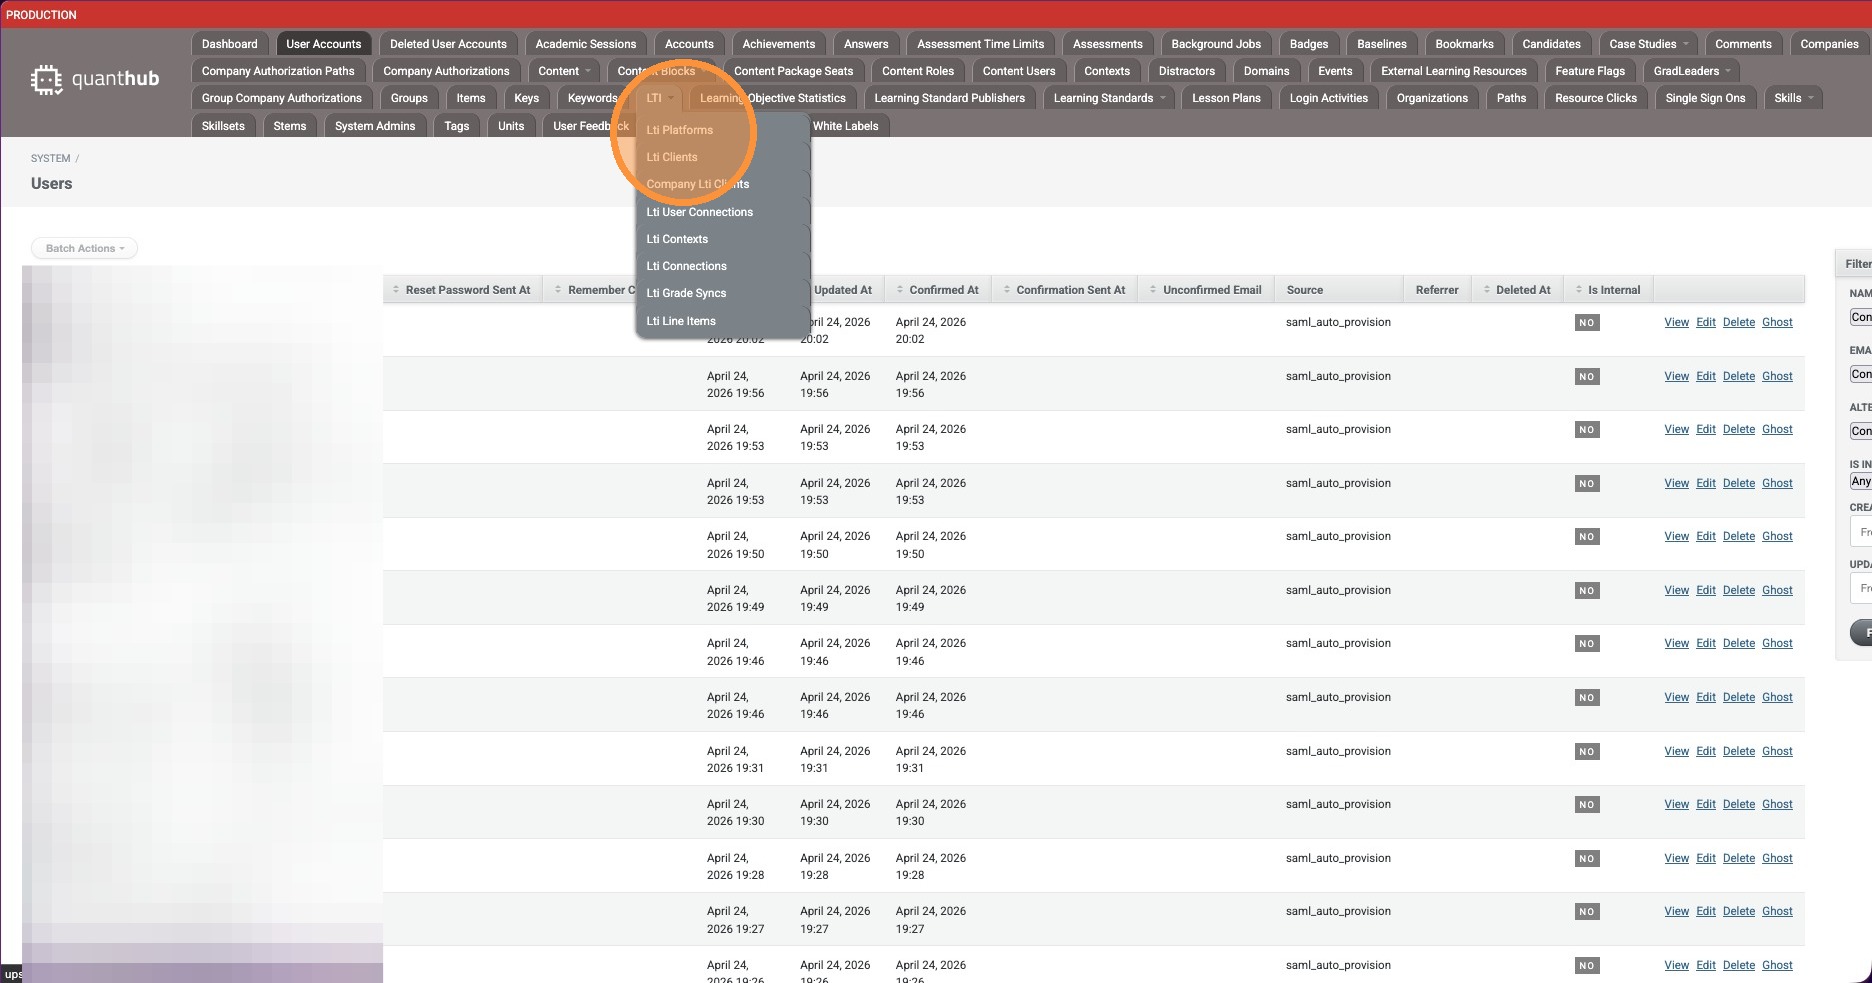
20. Select "New Lti Platform".
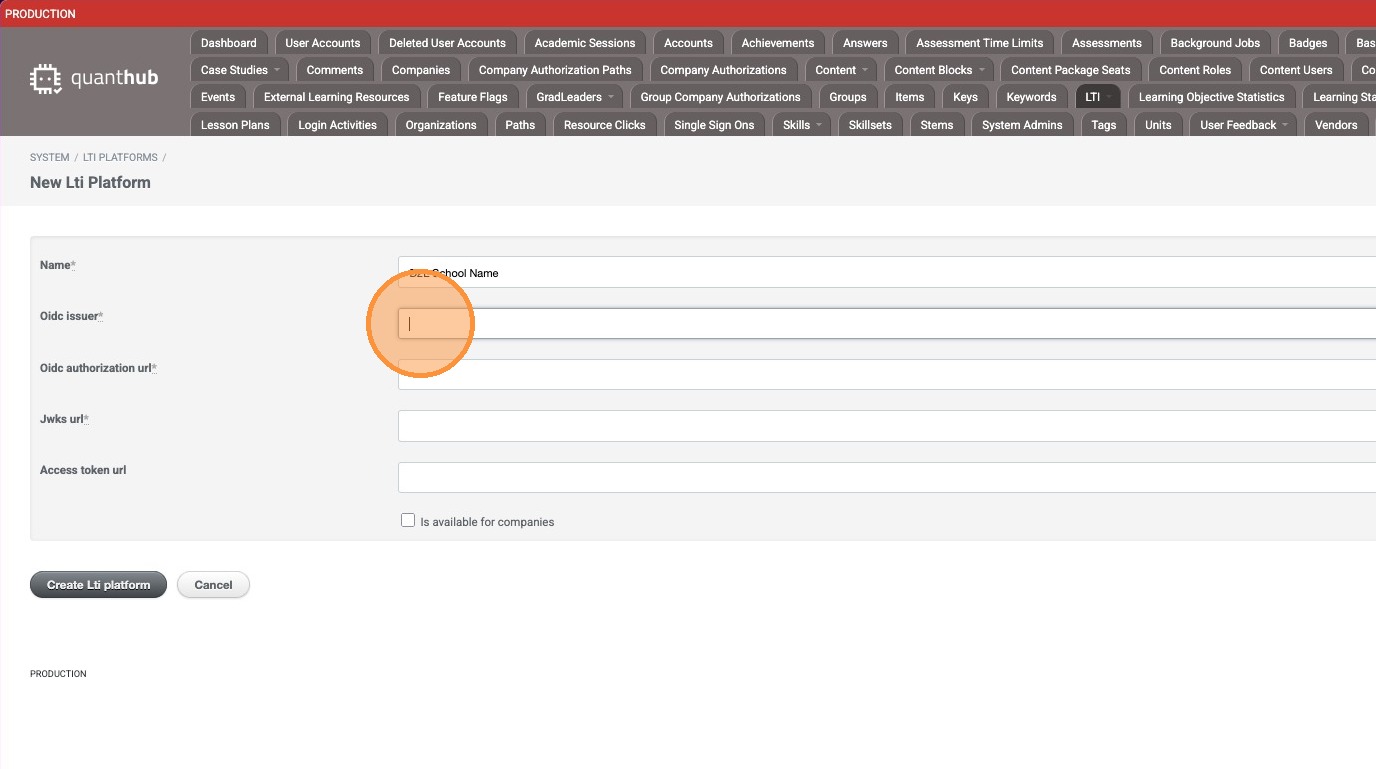
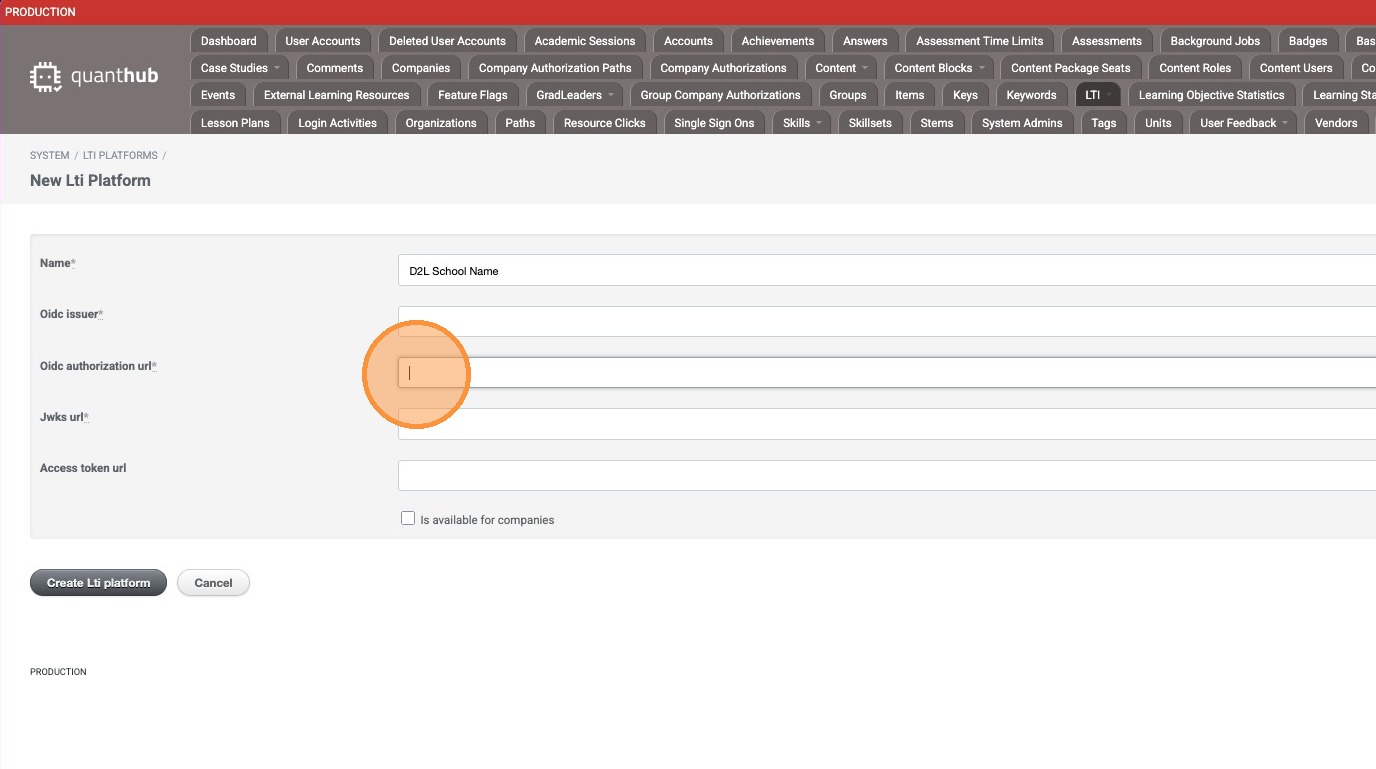
21. In the name field, enter "Brightspace [SCHOOL]".

22. For the OIDC Issuer field, enter the Issuer URL provided by the LMS admin.
23. For the OIDC Authorization URL, enter the OpenID Connect Authentication Endpoint URL provided by the LMS admin.
24. For the JWKS URL, enter the Brightspace Keyset URL provided by the LMS admin.
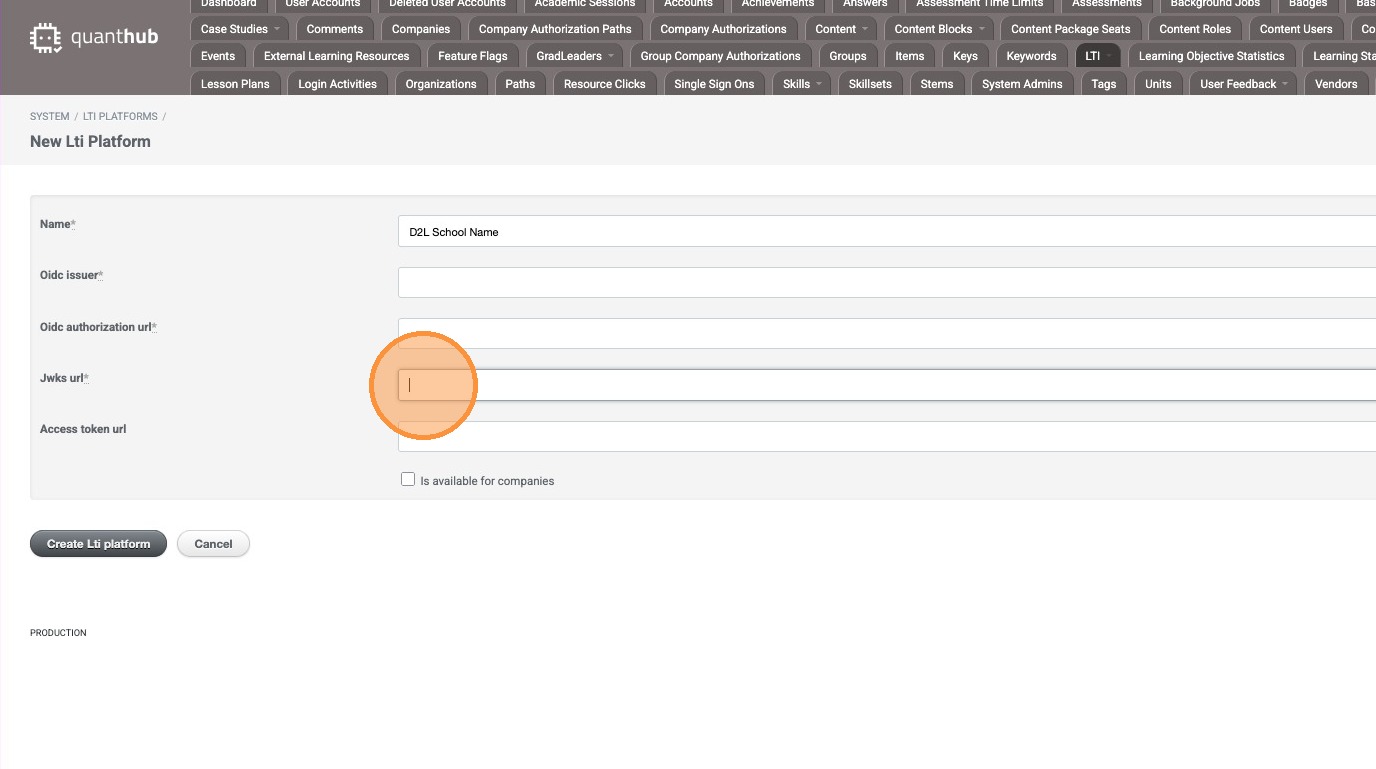
25. For the Access Token URL, enter the Brightspace OAuth2 Access Token URL provided by the LMS admin.
26. Check the box for "Is available for companies".
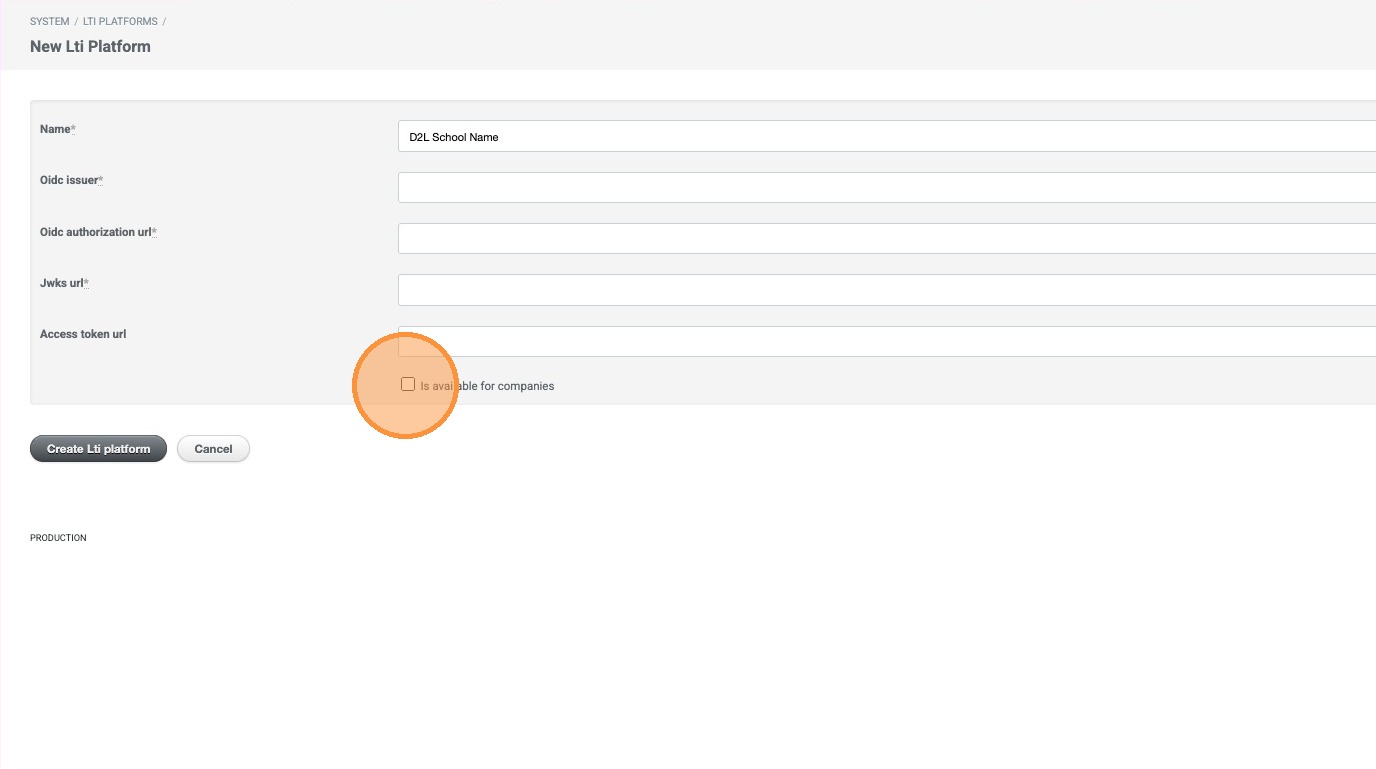
27. Select "Create Lti Platform".

28. In an administrator account in QuantHub, if you are not already in the Admin app, first select your nine-dot menu.
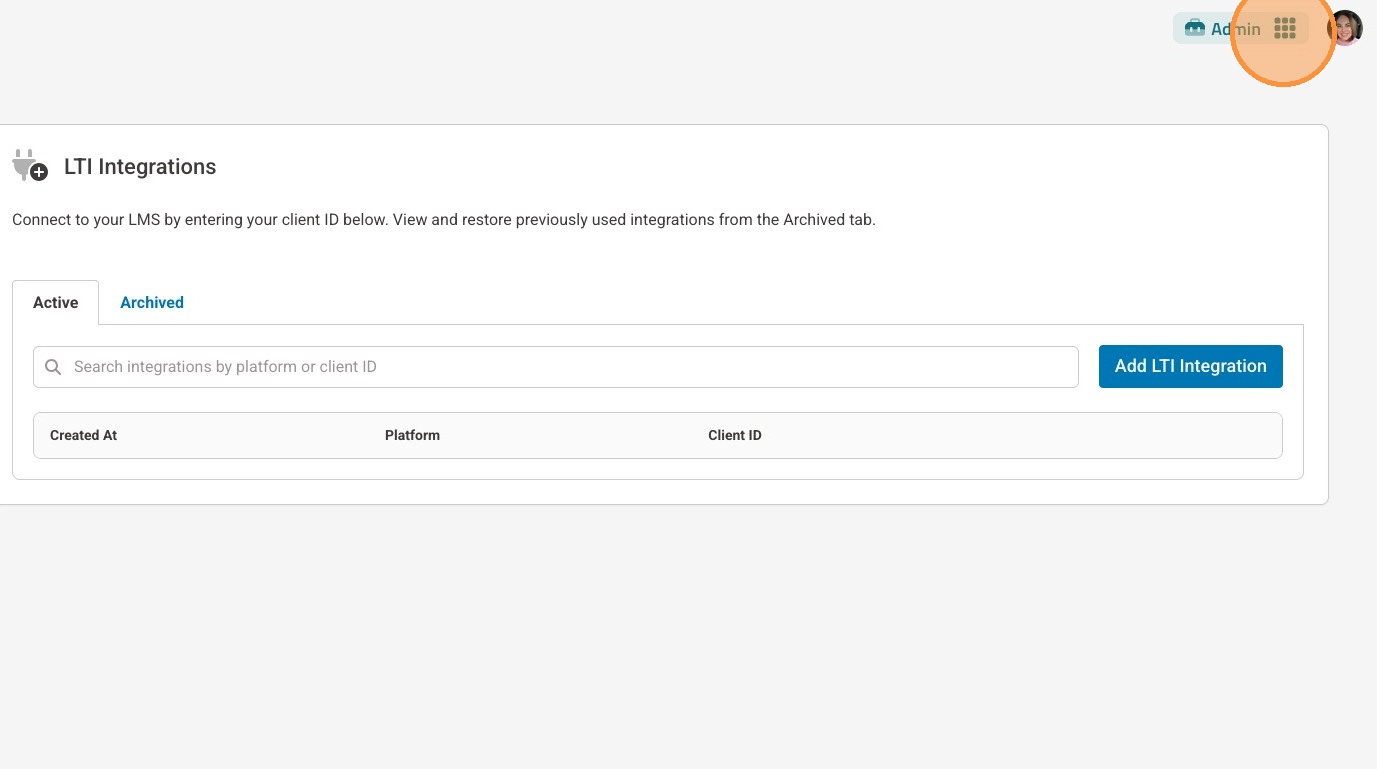
29. Then, select "Admin".
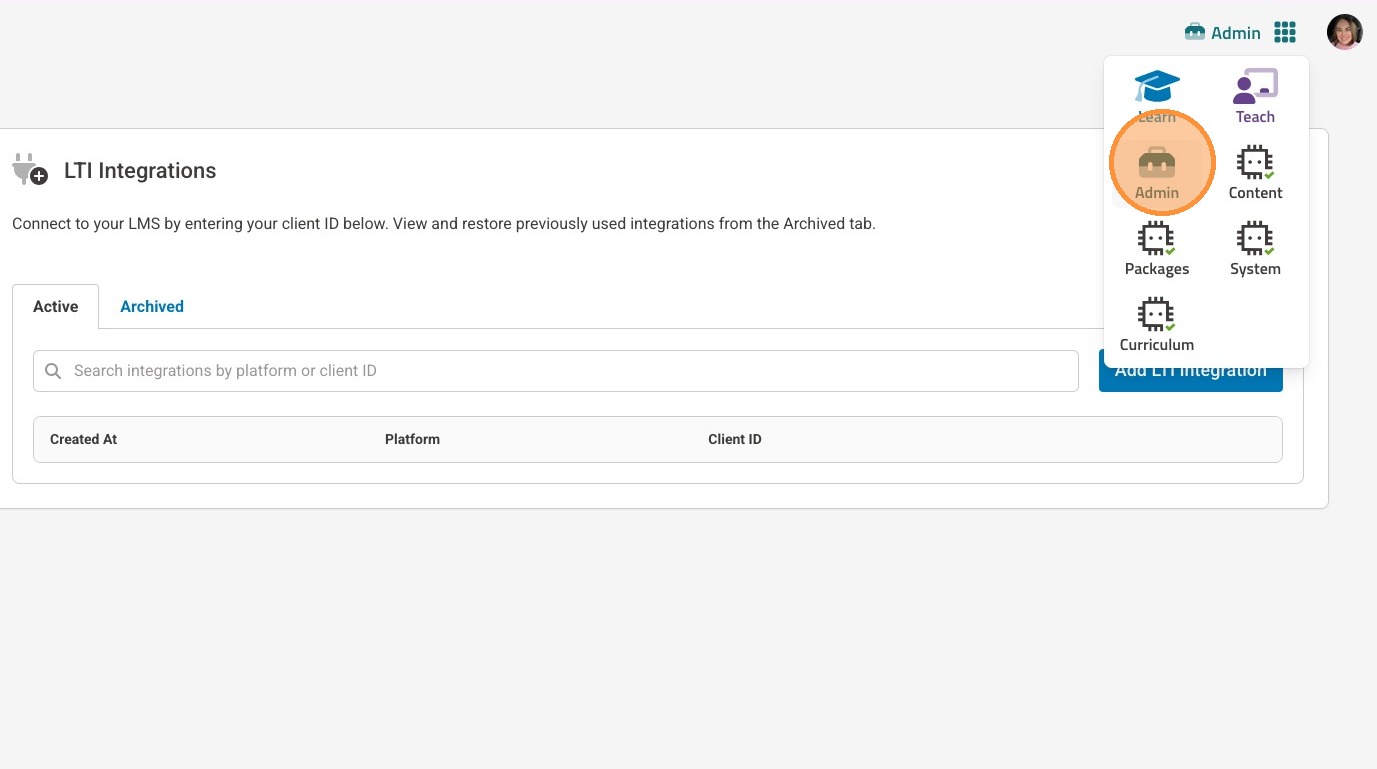
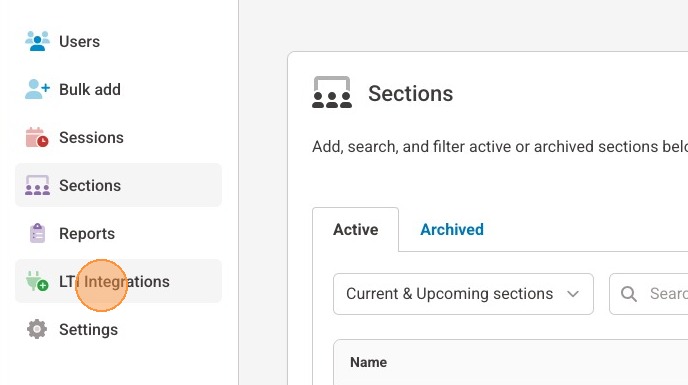
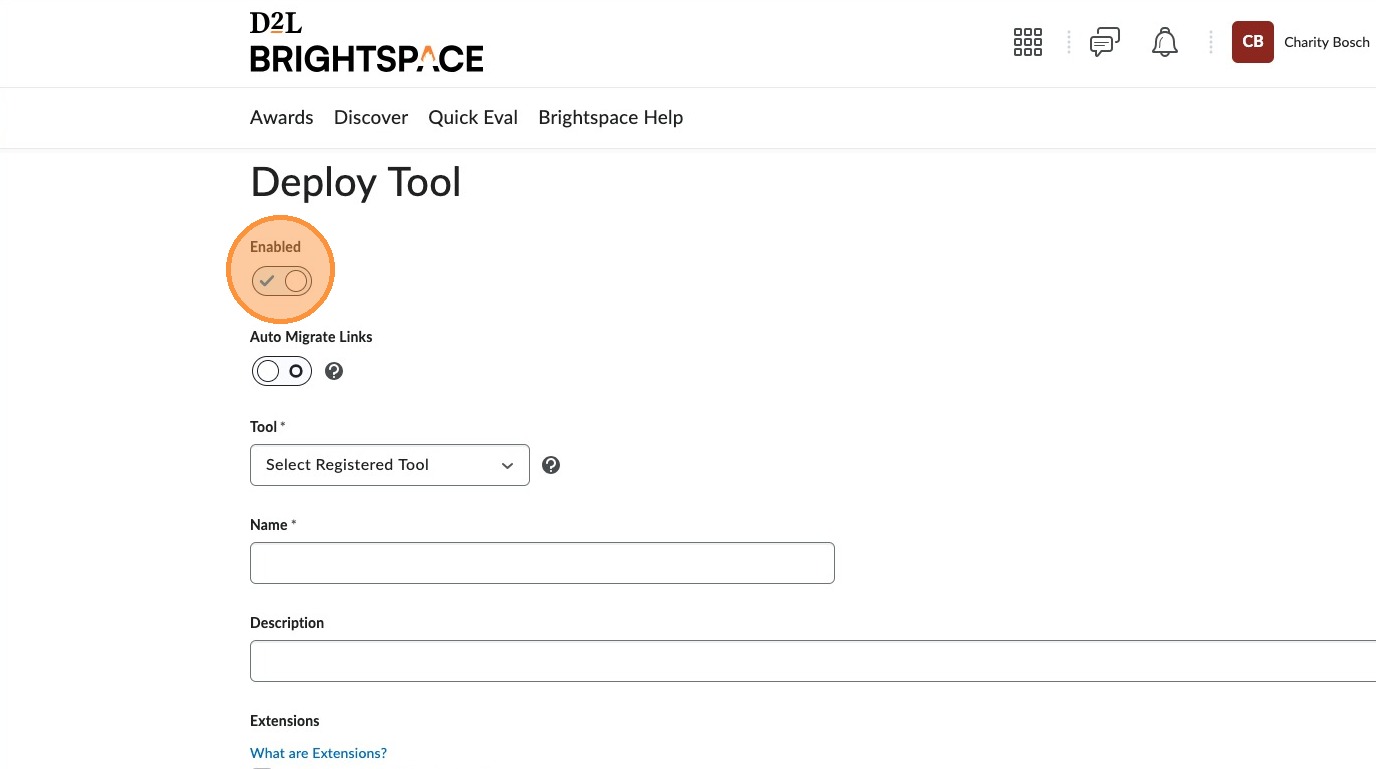
30. Select "LTI Integrations" in the left-side menu.
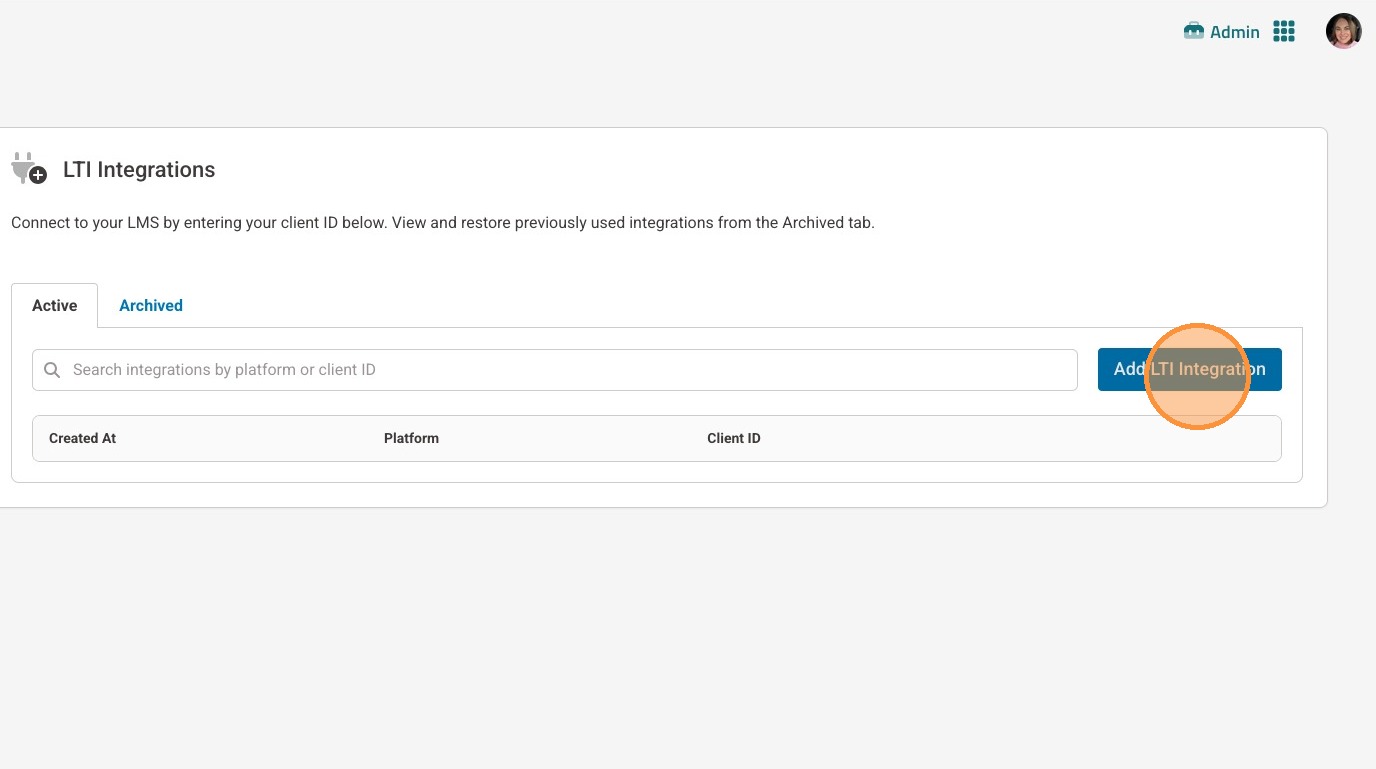
31. Select "Add LTI Integration".
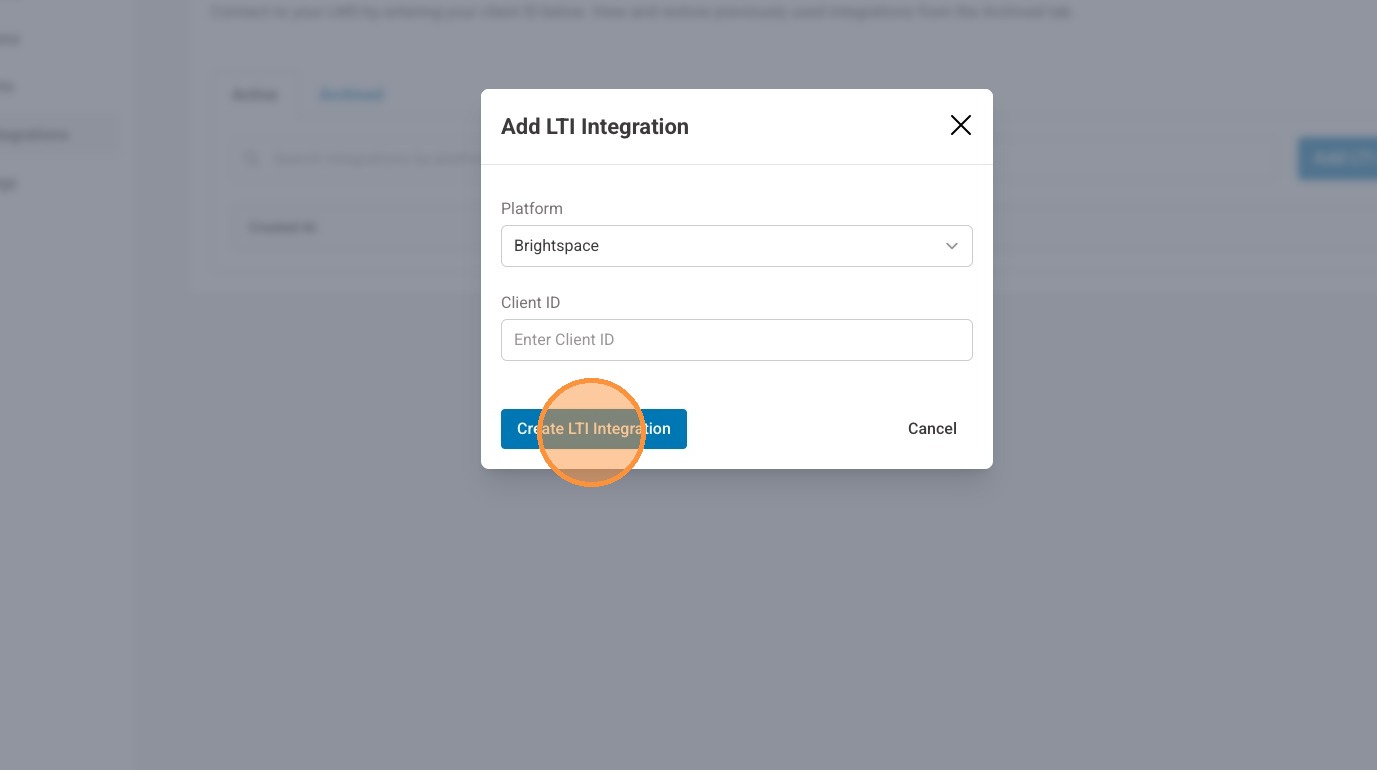
32. In the pop-up window, select "Brightspace [SCHOOL]" for your platform.
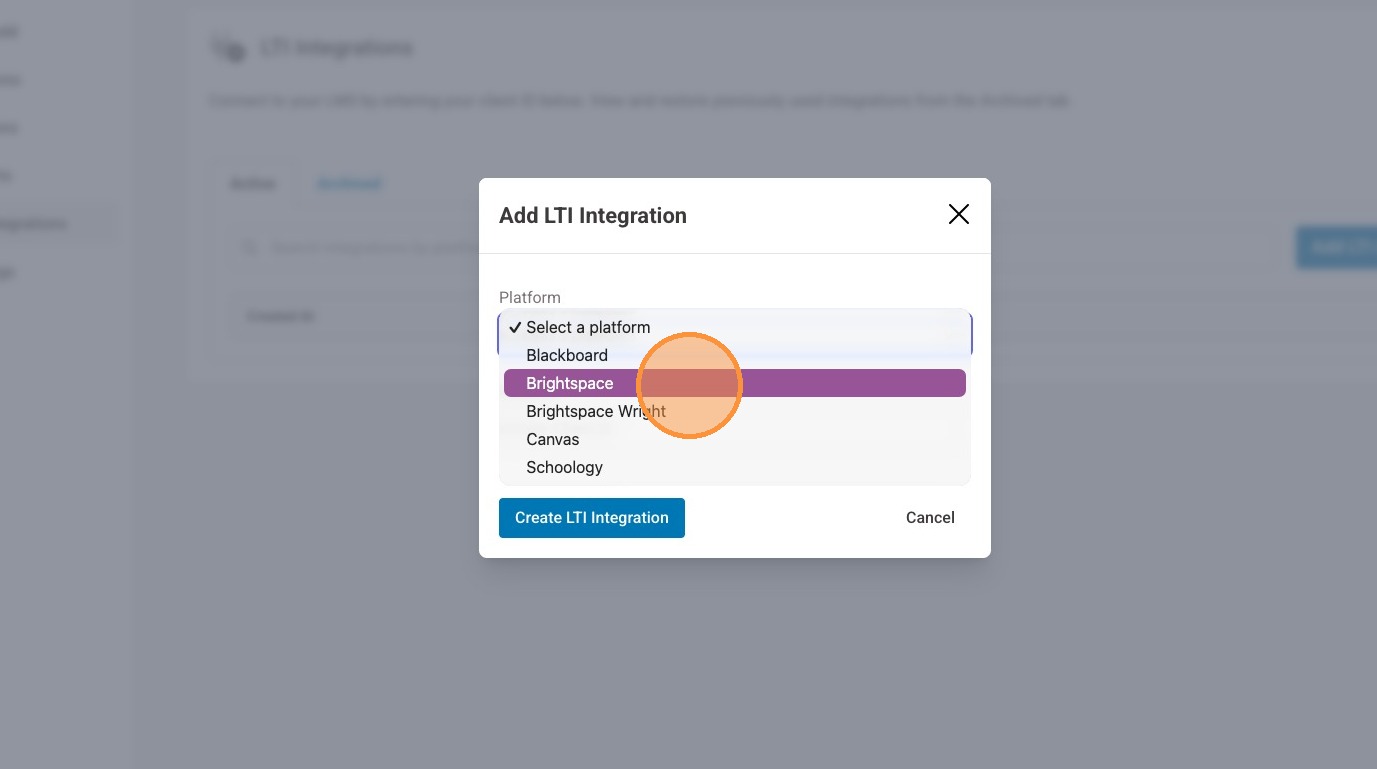
33. Enter the Client ID you received after you added the QuantHub LTI tool in your Brightspace account.
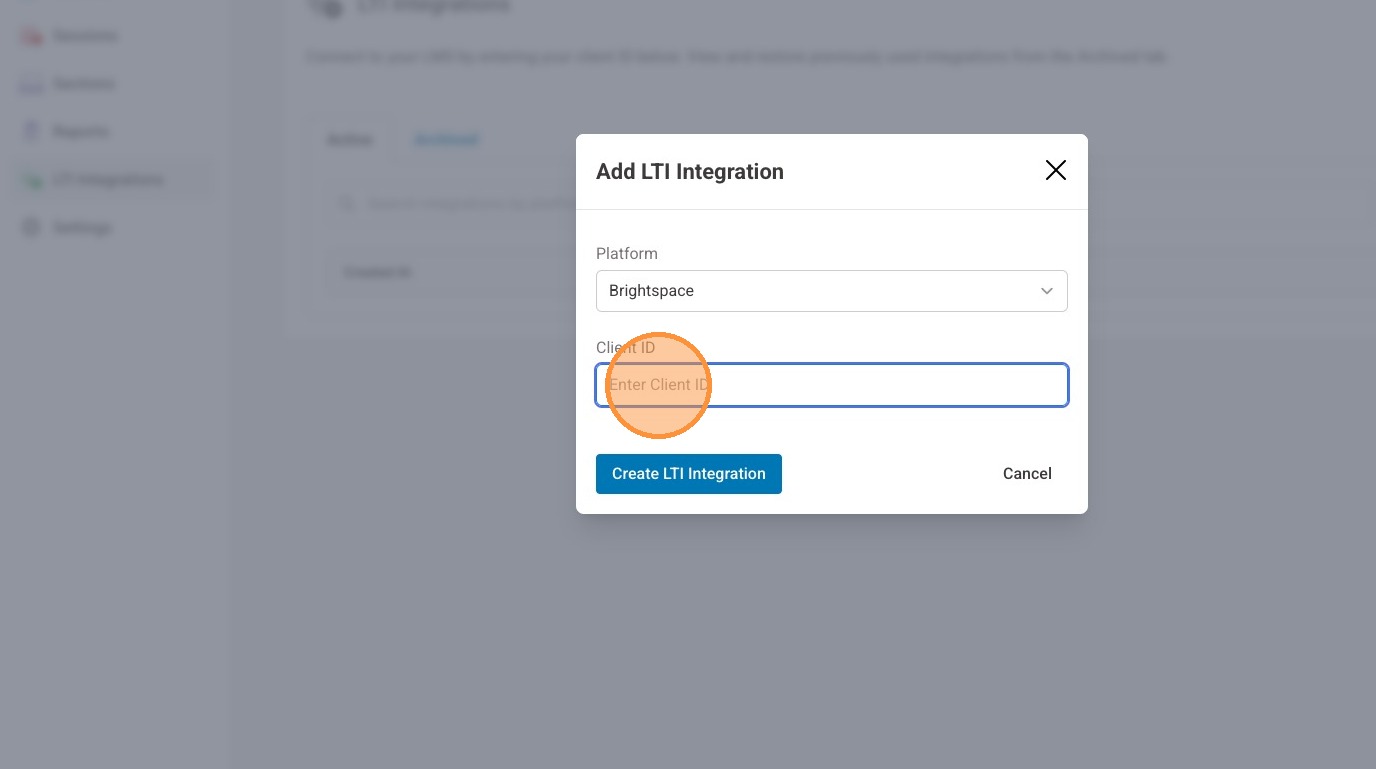
34. Select "Create LTI Integration".
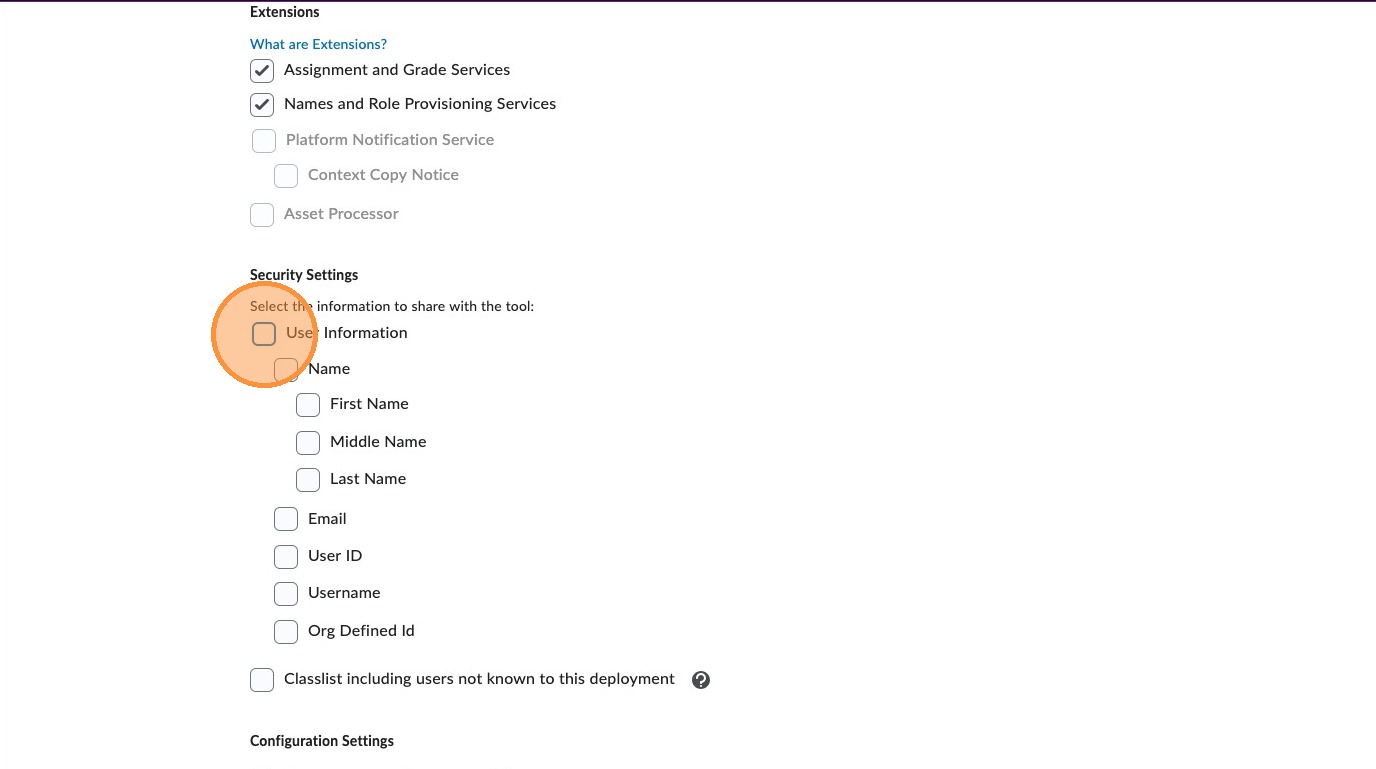
Brightspace Steps Part 2
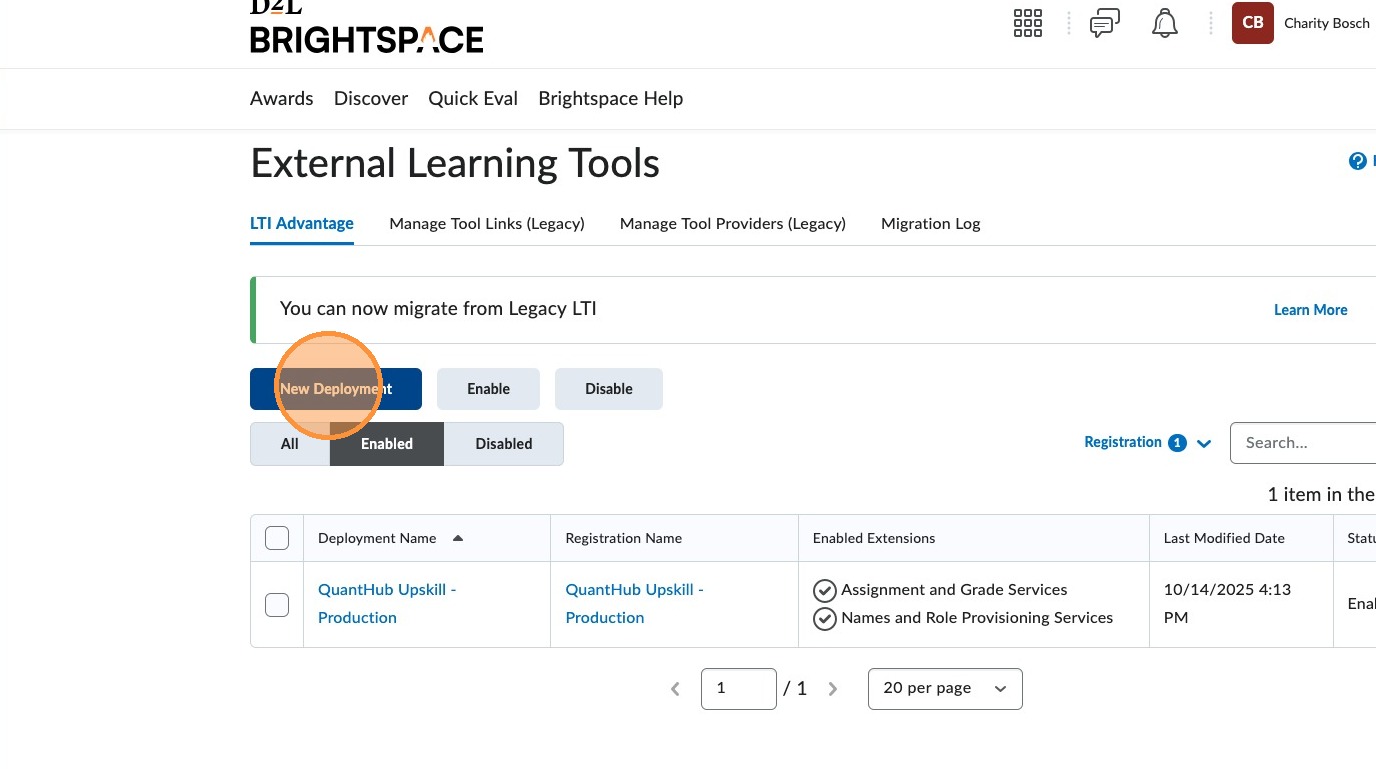
35. Back in your Brightspace account, under the registration details select "View Deployments".
36. Select "New Deployment".
37. Ensure "Enabled" is toggled on.
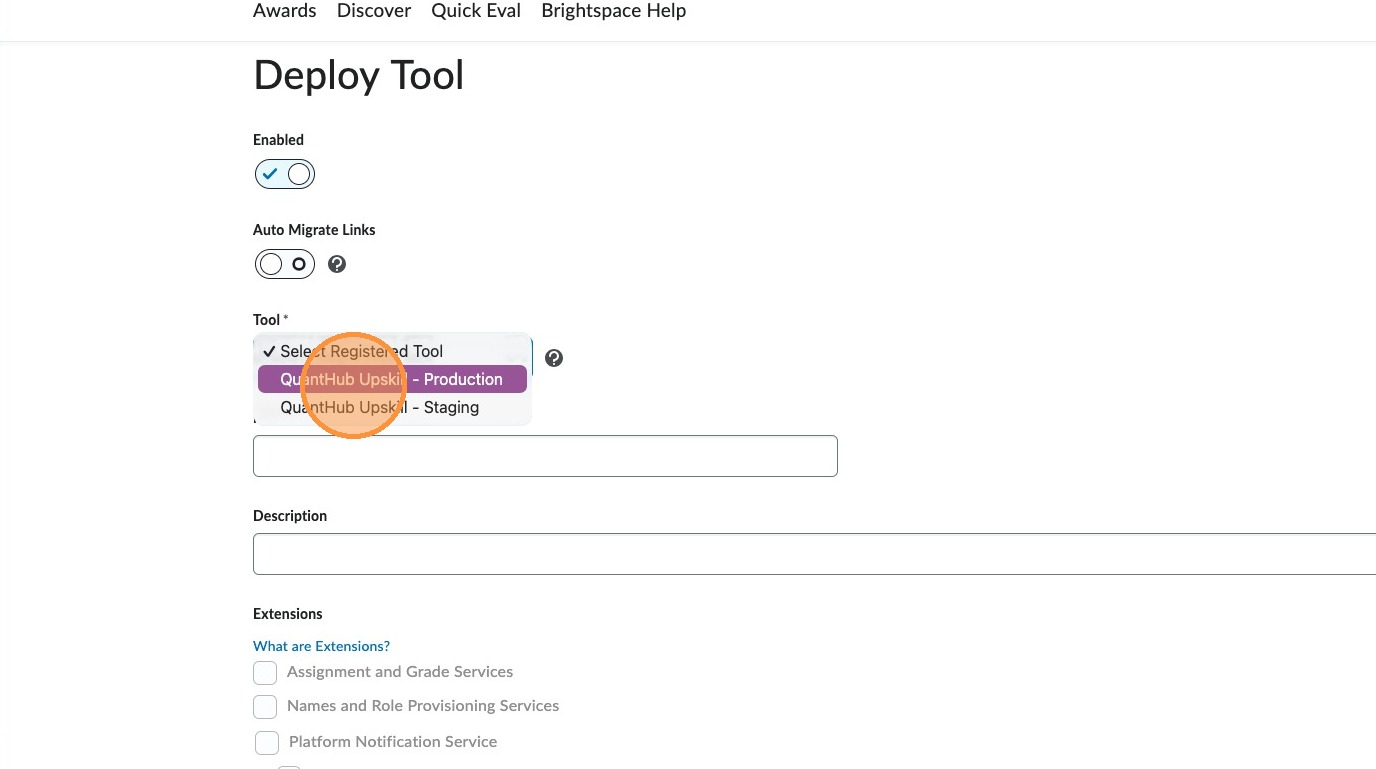
38. From the "Tool" dropdown, select the QuantHub Upskill option you just created.
39. For Name, enter: QuantHub Upskill.
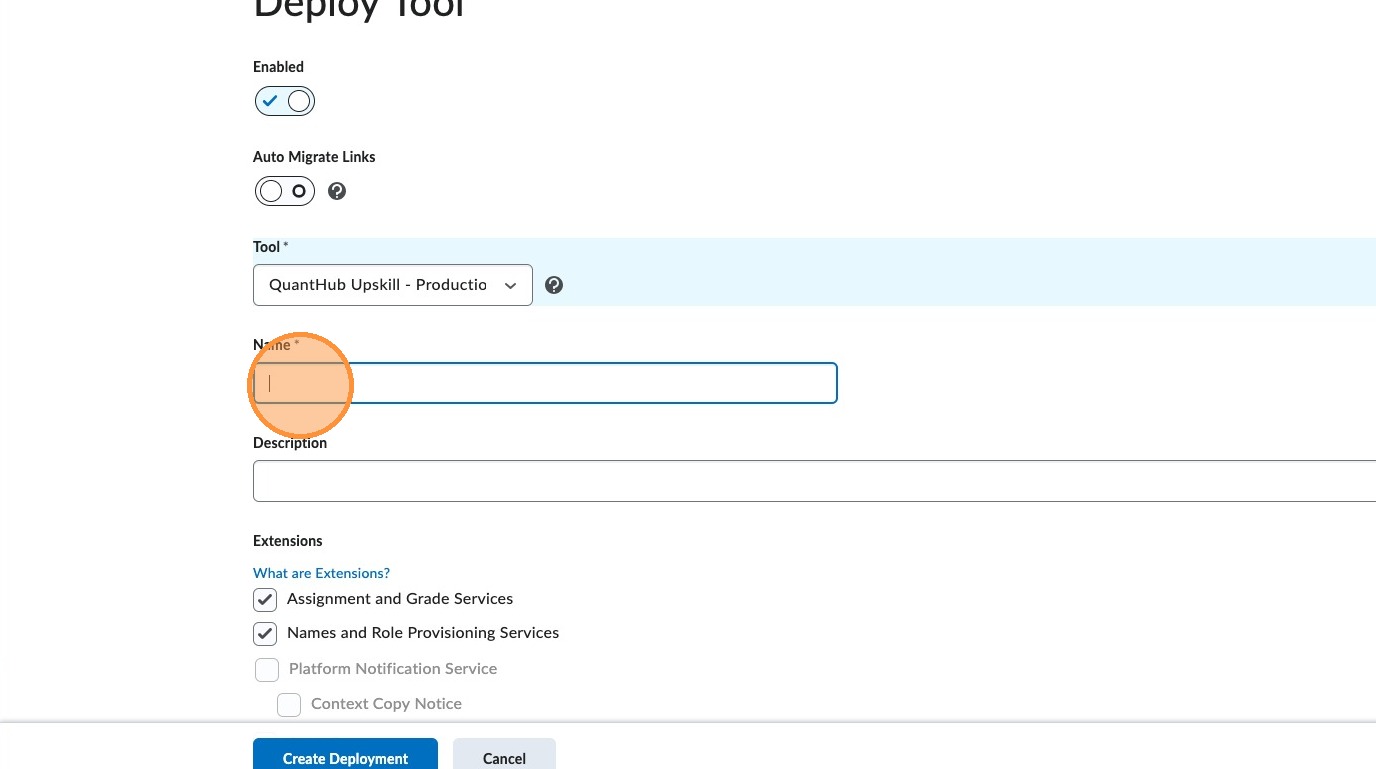
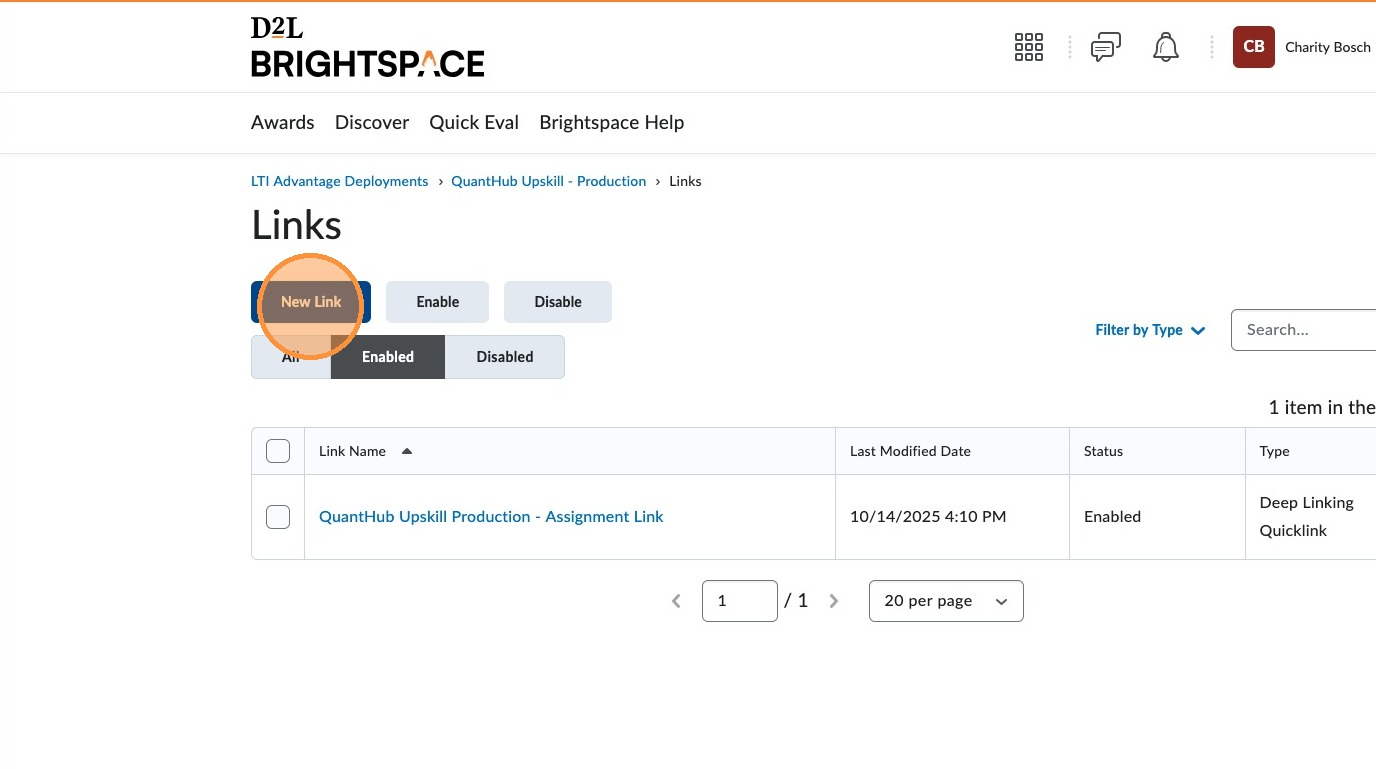
40. For Description, enter: QuantHub helps instructors teach industry skills.
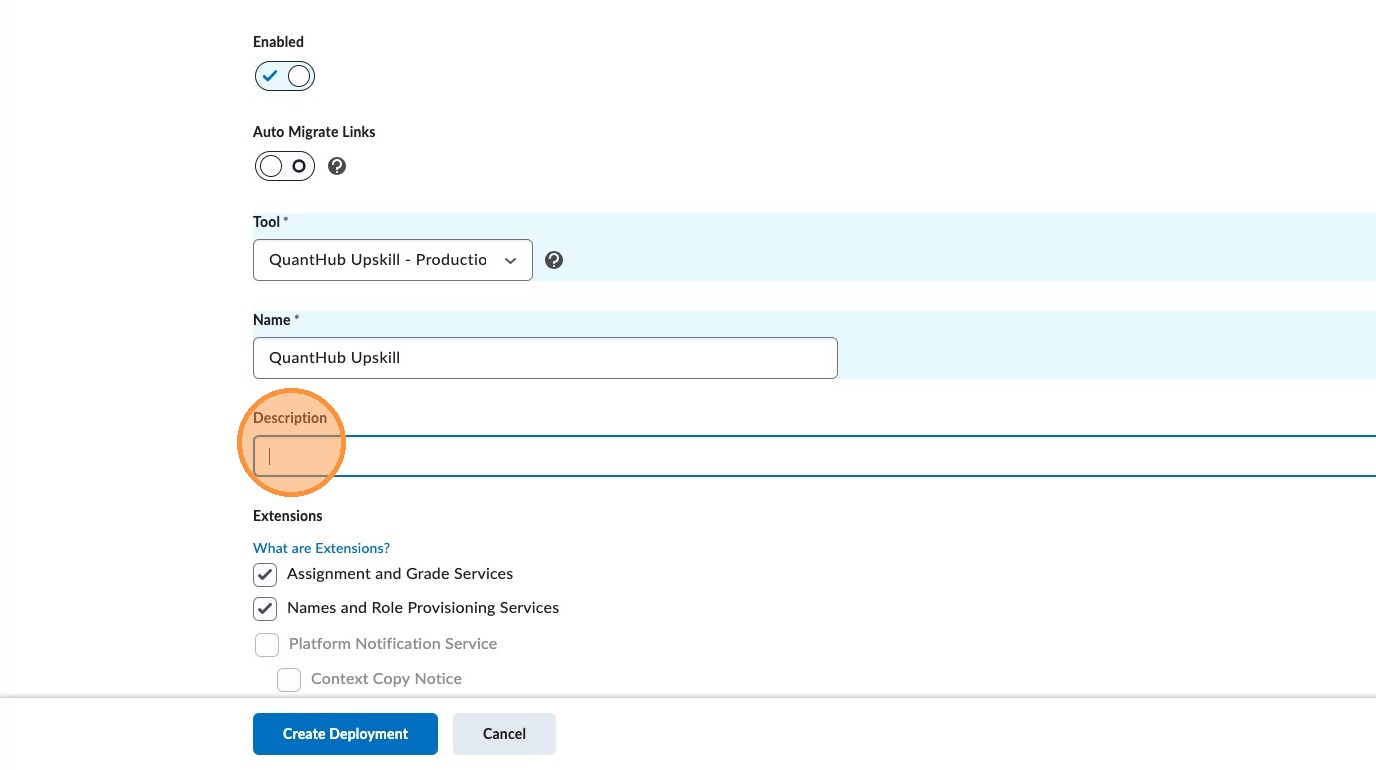
41. Ensure that the checkboxes under Extension are checked for "Assignment and Grade Services" and "Name and Role Provisioning Services".
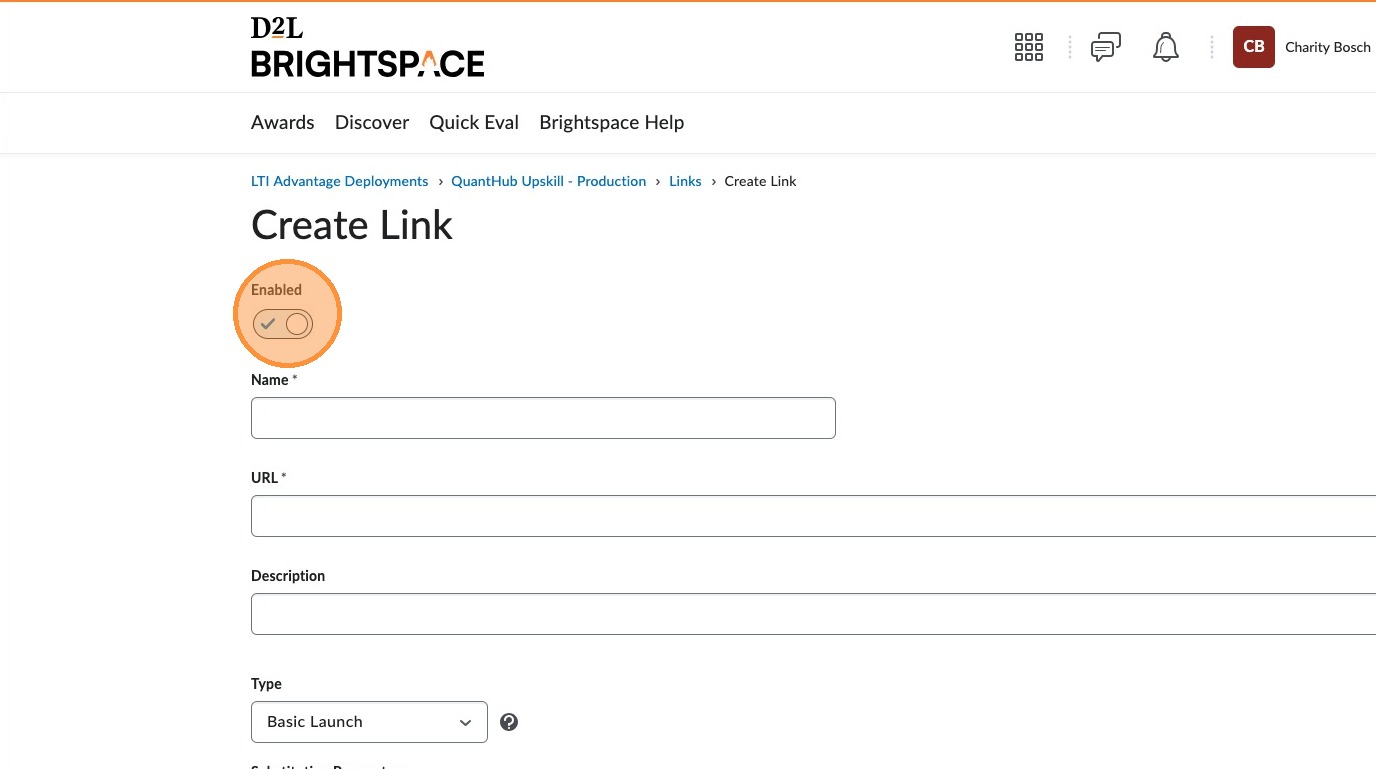
42. Under Security Settings, first select the box for "User Information".
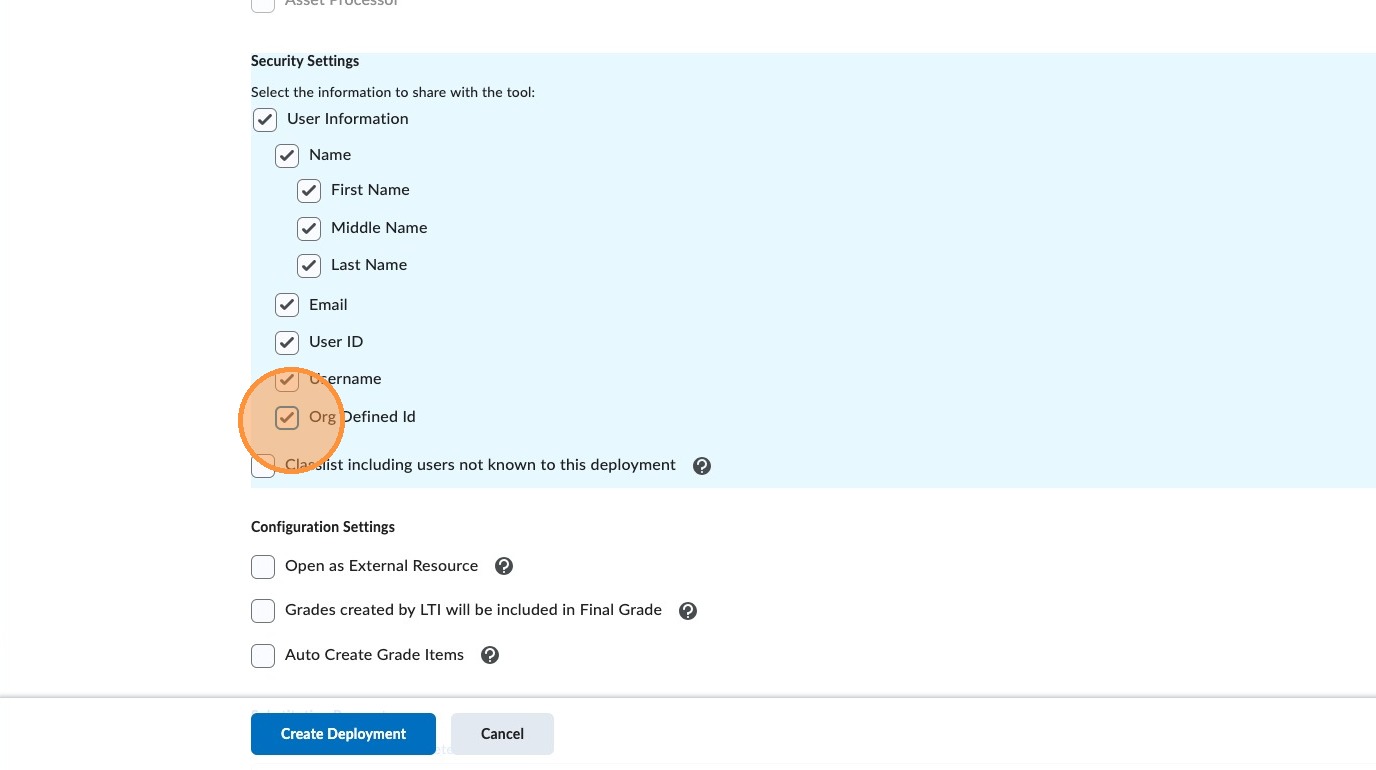
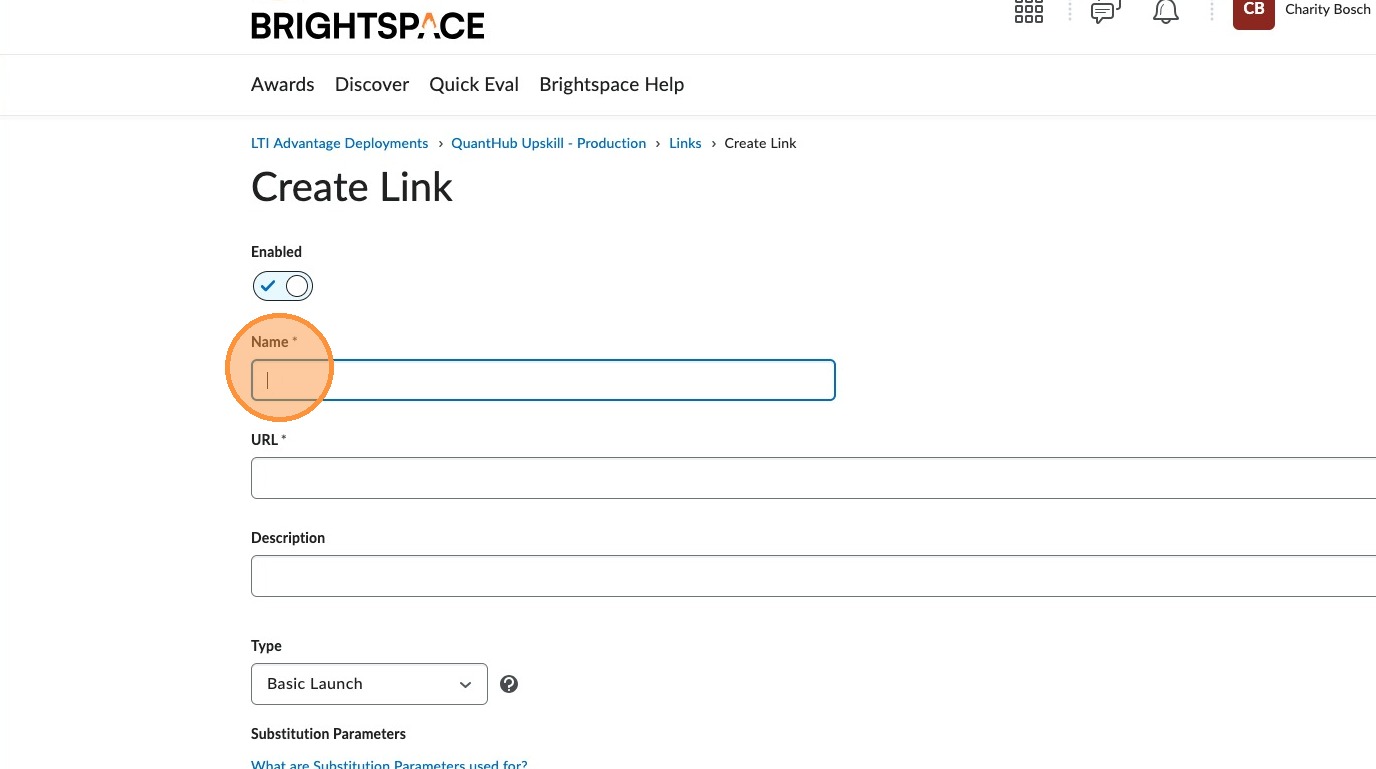
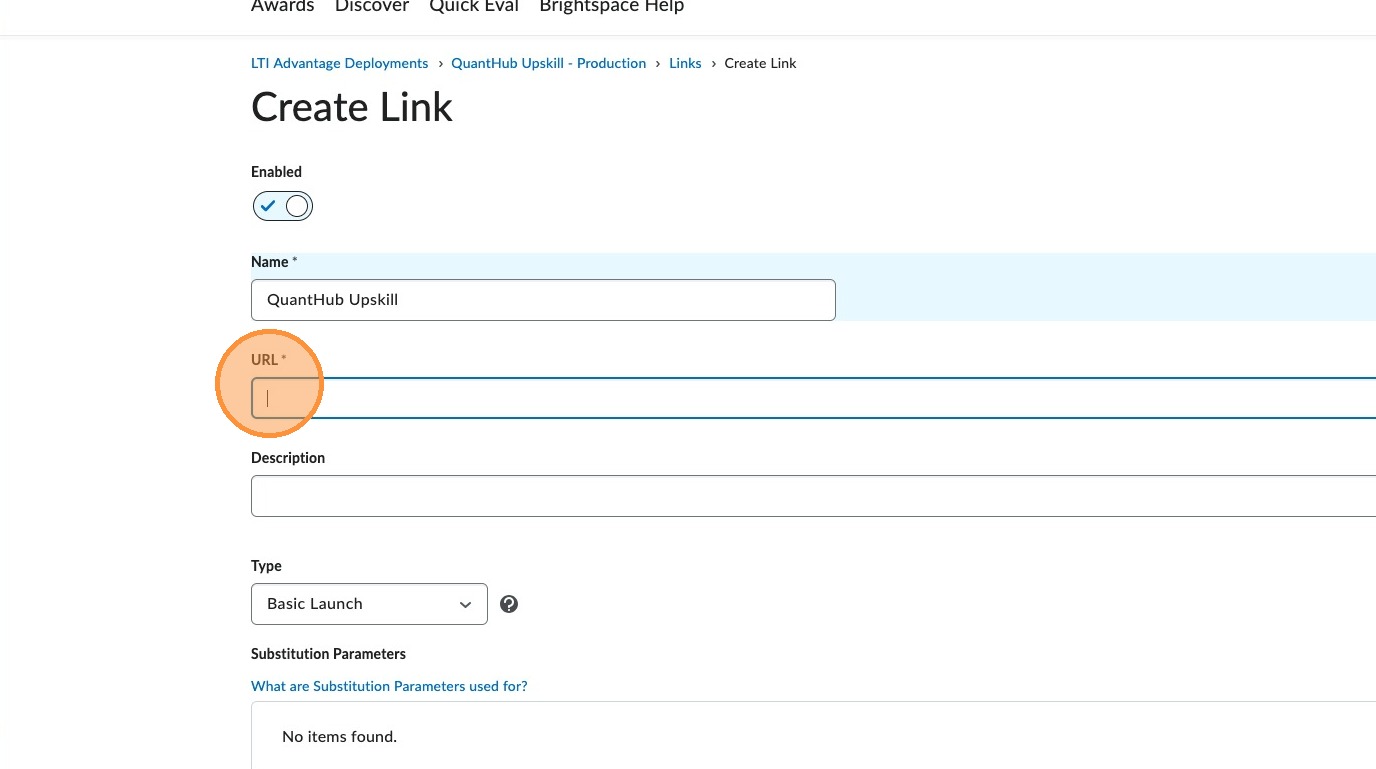
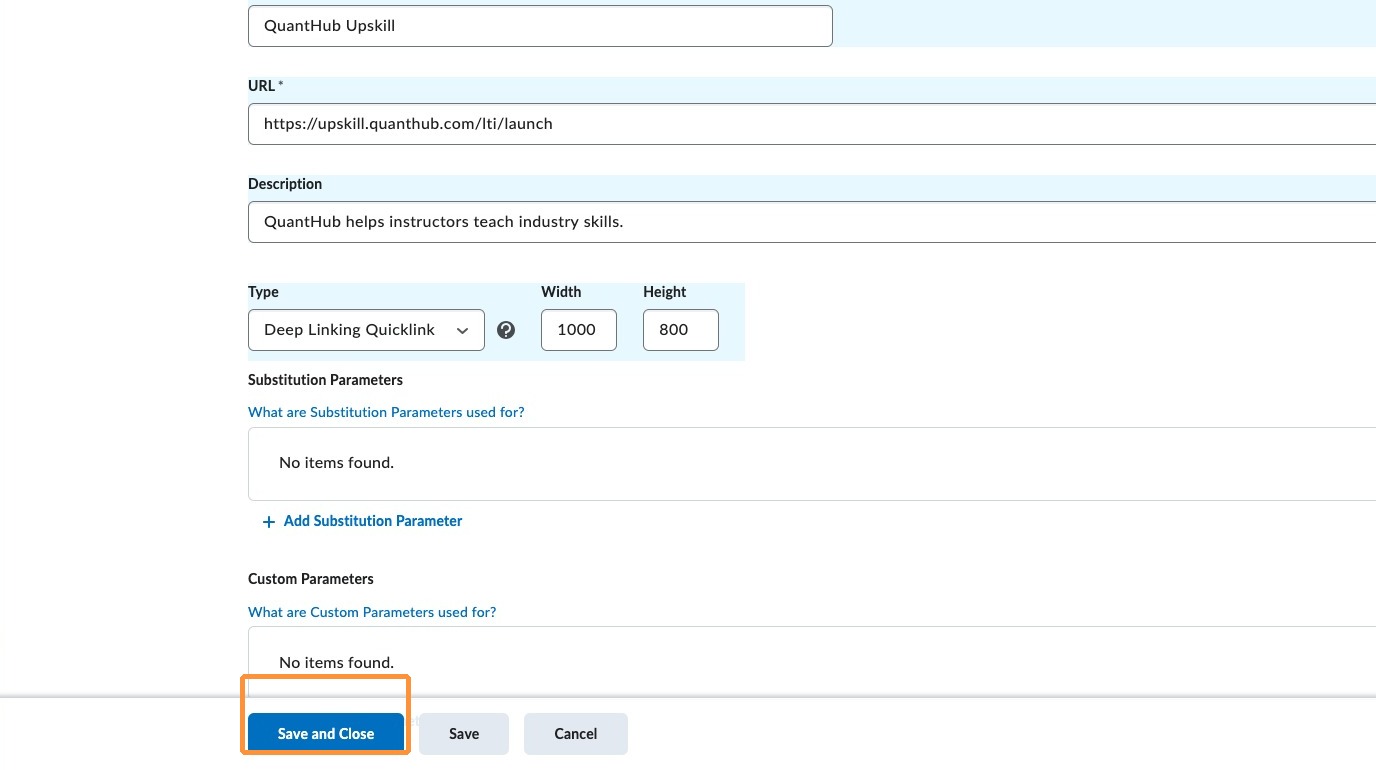
43. Then uncheck the box for "Org Defined Id".
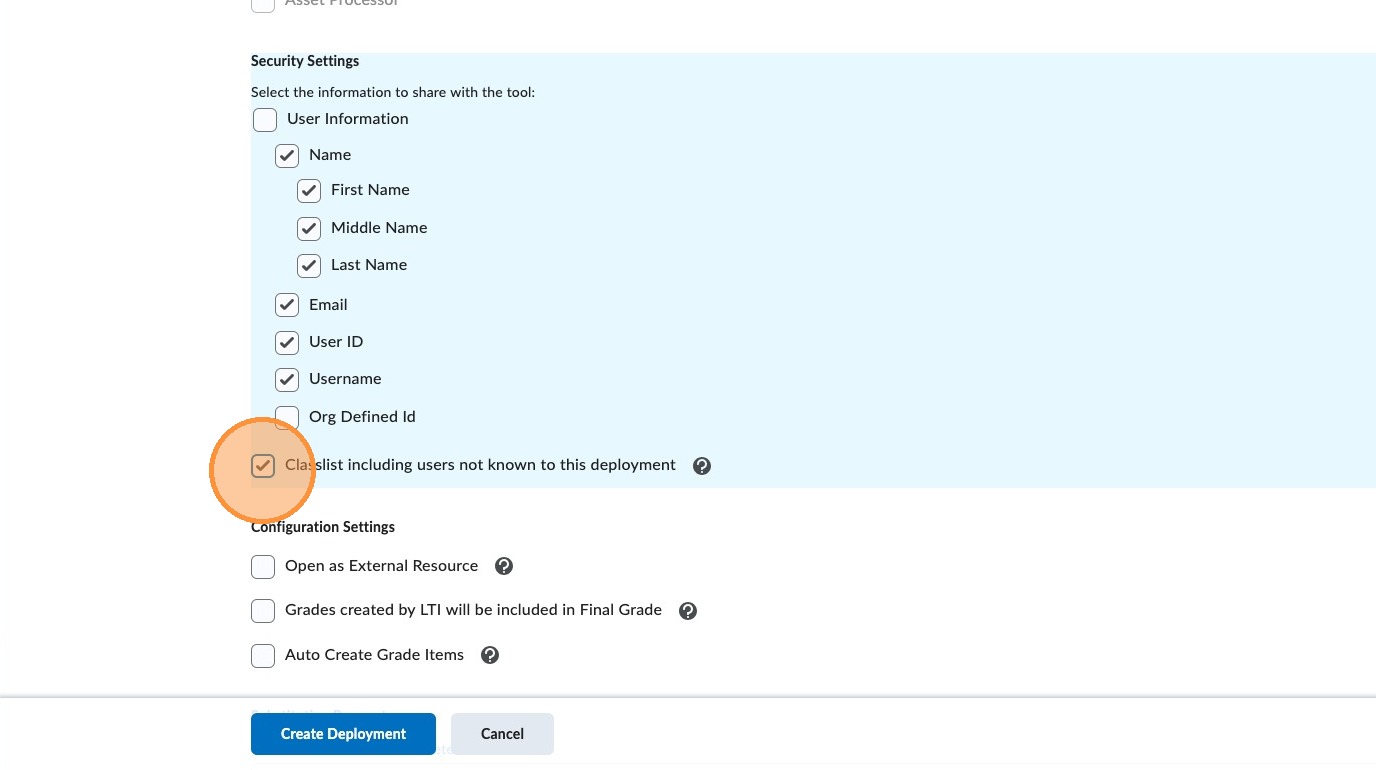
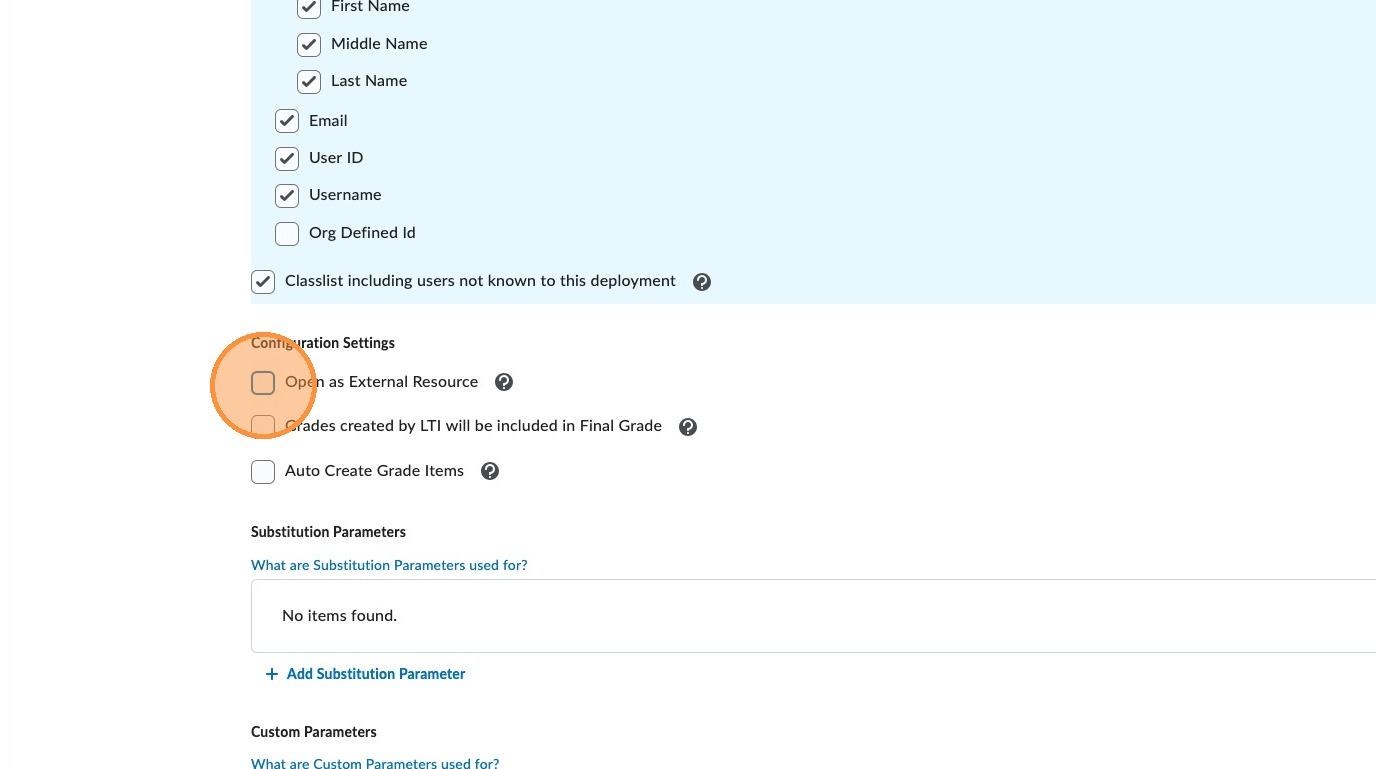
44. Select the box for "Classlist including users not known to this deployment".
45. Under Configuration Settings, select the box for "Open as External Resource".
46. Select "Add Org Units" and select all appropriate units.
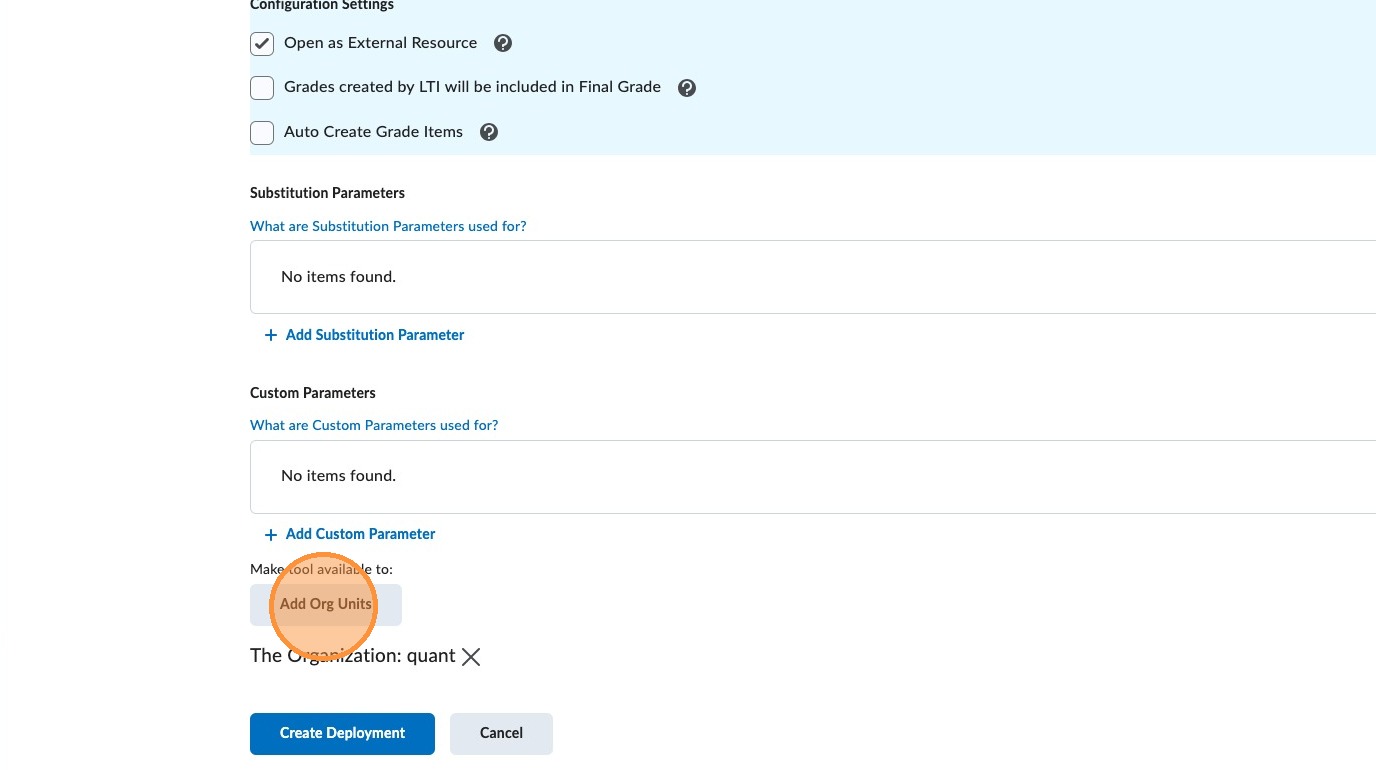
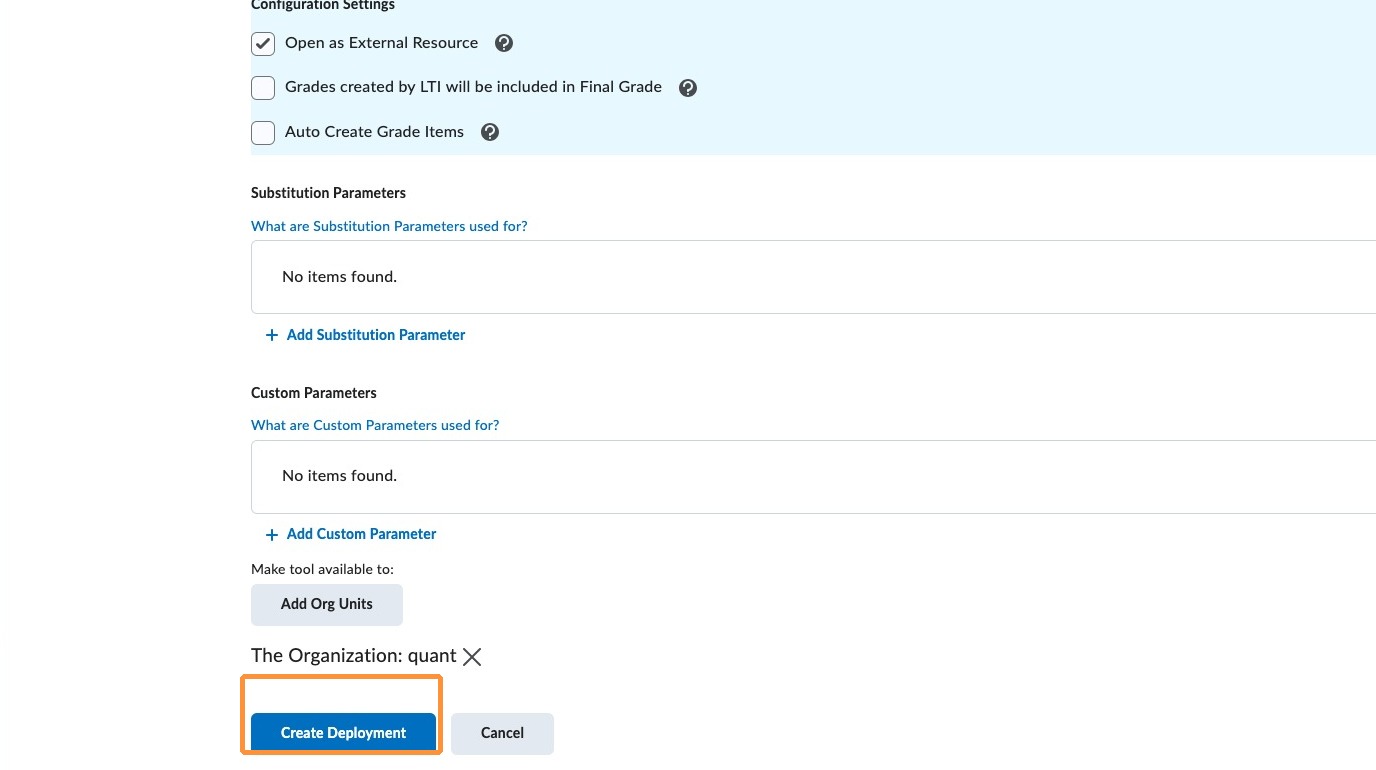
47. Select "Create Deployment".
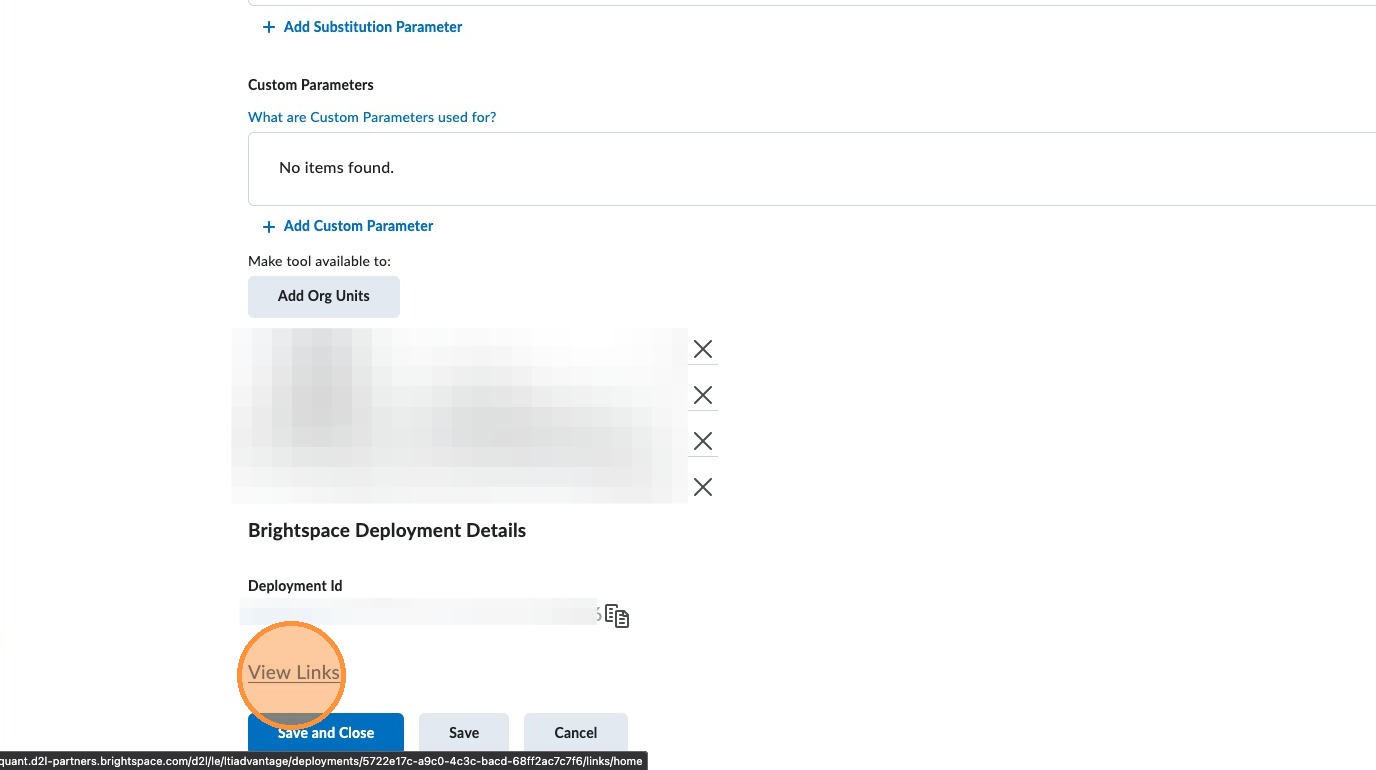
48. Select "View Links" under the Deployment Details.
49. Select "New Link".
50. Ensure "Enabled" is toggled on.
51. For Name, enter: QuantHub Upskill.
52. For URL, enter: https://upskill.quanthub.com/lti/launch.
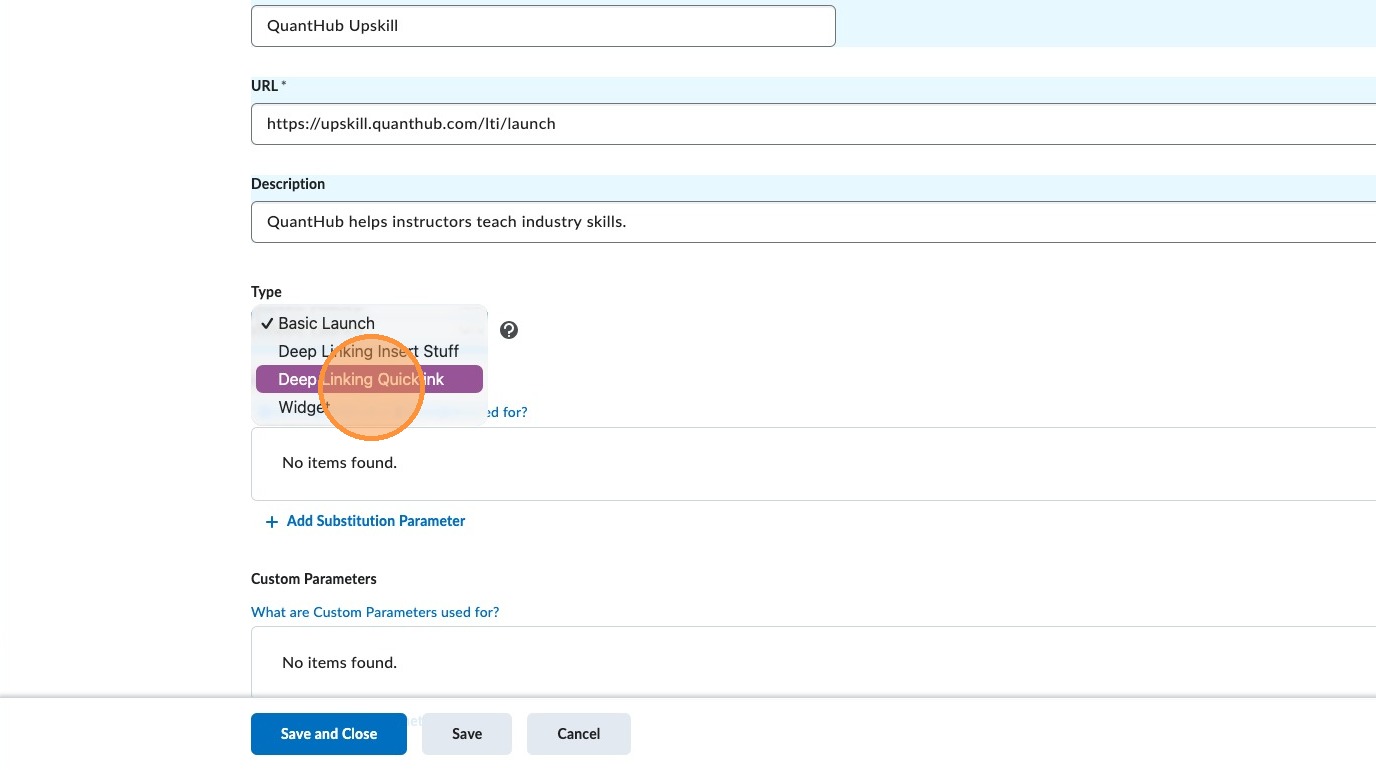
53. For Description, enter: QuantHub helps instructors teach industry skills.
54. In the Type dropdown, select "Deep Linking Quicklink".
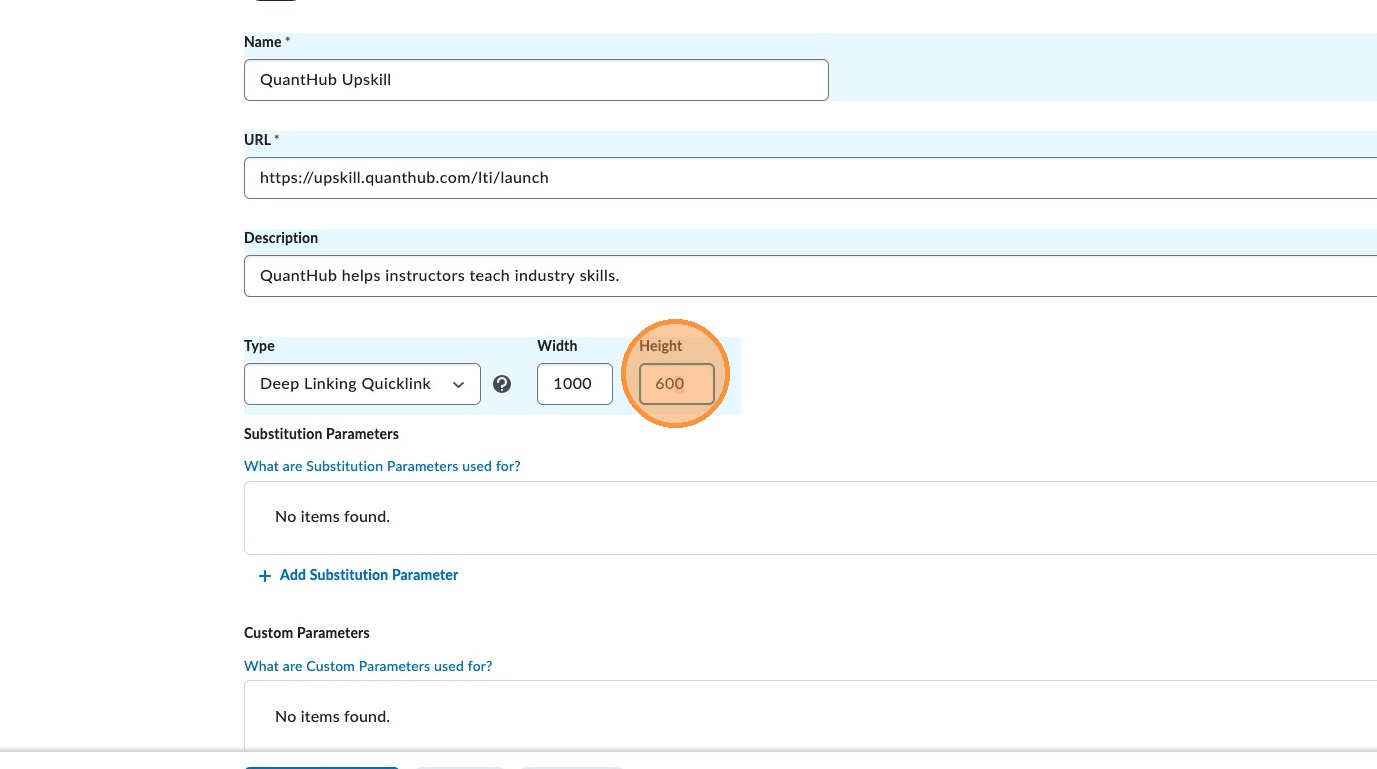
55. Change the width to 1000.
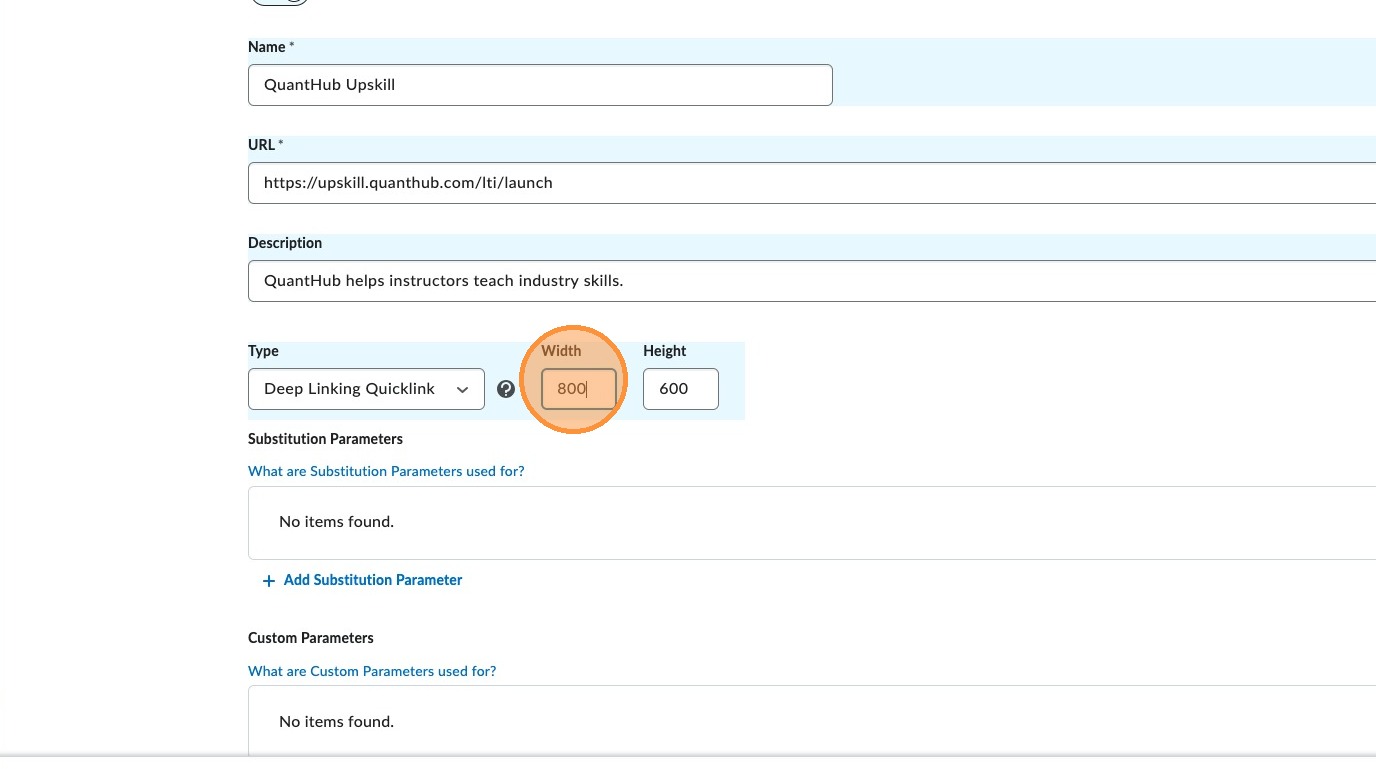
56. Change the height to 800.
57. Select "Save and Close".
Was this article helpful?
That’s Great!
Thank you for your feedback
Sorry! We couldn't be helpful
Thank you for your feedback
Feedback sent
We appreciate your effort and will try to fix the article